Printing Photos
About a year ago I got a fancy Canon Pro 200 photo printer. Since then, I've been learning how to print photos at home. Here's an unstructured list of things I learned:
Make sure your screen isn’t too bright. There’s no hard and fast rule for screen brightness (contrary to popular belief1). If the screen is too bright, everything looks more saturated and contrasty; thus, you’ll edit with reduced contrast and saturation, and your prints will look flat. So, if your prints look too flat, lower your screen brightness. Conversely, if your prints look too contrasty, raise your screen brightness.
Avoid stray light onto your screen, as this produces glare, which raises the screen’s black point. If that happens, you’ll compensate by lowering your blacks in the edit, leading to prints with crushed blacks. If your prints have muddy, crushed blacks, check your screen for stray light. Better screens often come with much better antireflective coatings, which makes a big difference.
Avoid colorful objects within your field of vision while editing, these will bias your color perception. If your prints come out with an unexpected color cast, check if there is too much color in your field of vision while editing. This may include moody lighting or colored furniture. A colorful desktop background on your secondary screen can also be a problem.
See that your screen uses a neutral color temperature of 5000-6500K, use room lighting with a similar color temperature (4000-5000K), use a screen with decent colors, or calibrate your screen. But frankly, calibration is only relevant if you fixed everything else first, and only makes a small difference on a decent screen. Beware of old screen calibrators, though, as some models can age and drift over time2.
Make sure to edit with full-black and full-white. Prints have very limited dynamic range. Off-black blacks and off-white whites tend to look flat and broken. Use Darktable’s color assessment mode or a white editing background to get a feel for what white should be, and look at your histogram or waveform to ensure deep blacks. Off-white is immediately obvious in a print, off-black just looks muddy.
Prints need to be sharpened specifically for the intended print size. It’s not sufficient for details to be sharp at a pixel level. In fact, the pixel level is often entirely meaningless, as it’s way too small to be visible (corollary: noise doesn’t matter). So resize your image for the intended print size, and sharpen that file. Or use your printer driver’s sharpening option if there is one (“contrast reproduction” in Canon’s driver). Alternatively, dedicated printing software such as QImage often includes dedicated sharpening options for printing.
When experimenting with different papers, be aware that ICC profiles correct for the paper's tint. A print on a warm stock will be printed with cooler colors to compensate. This can look very silly. Especially for black-and-white prints, you're often better off to use the printer's black-and-white mode that doesn't introduce a color cast. In general, I've seen a few rather poor ICC profiles. Unless you're truly committed to hit a particular hue (often required in commercial work), it's worth experimenting with using just the paper profile, but no ICC.
Different papers and formats have a big influence on the appearance of a print. It's good fun and very instructive to experiment with various options. I like to have at least a glossy, a lustre, and a smooth fine art stock at hand. You can use a more structured paper to hide a slight softness in the image. The paper size also plays a big role. I particularly like 10x15 card stock, and double-A4 panoramic paper. A4/letter is too common in our world, and often looks boring, so go bigger or smaller, or leave a white margin. I didn't see any big differences between similar papers of different manufacturers, so it's safe to buy affordable and local options for common papers3.
Lastly, it all depends on how the print will be presented. The print will look different depending on the illumination and surroundings. So whatever you do, make a small test print first, hold it up where it’s supposed to go, and adjust from there. It's quite common that prints change character as the illumination in the room changes throughout the day. In particular, make sure the print receives light from bulbs with a good CRI, or all your color corrections will be in vain.
there are standards for cinema, video, and retouching, which define appropriate screen brightness for different room illuminations. But these are meant for dark rooms. For looking at prints (and office ergonomics), however, you need a bright room, so the standards do not apply. What matters is appropriate contrast reproduction, which is possible in any illumination. As a rule of thumb, make the screen a bit less bright than you'd think.↩
In particular, the ColorMunki Smile and Spyder <= 5 are known to drift with age.↩
of course make sure the paper is appropriately coated for inkjet printing, and provides ICC profiles for your printer.↩
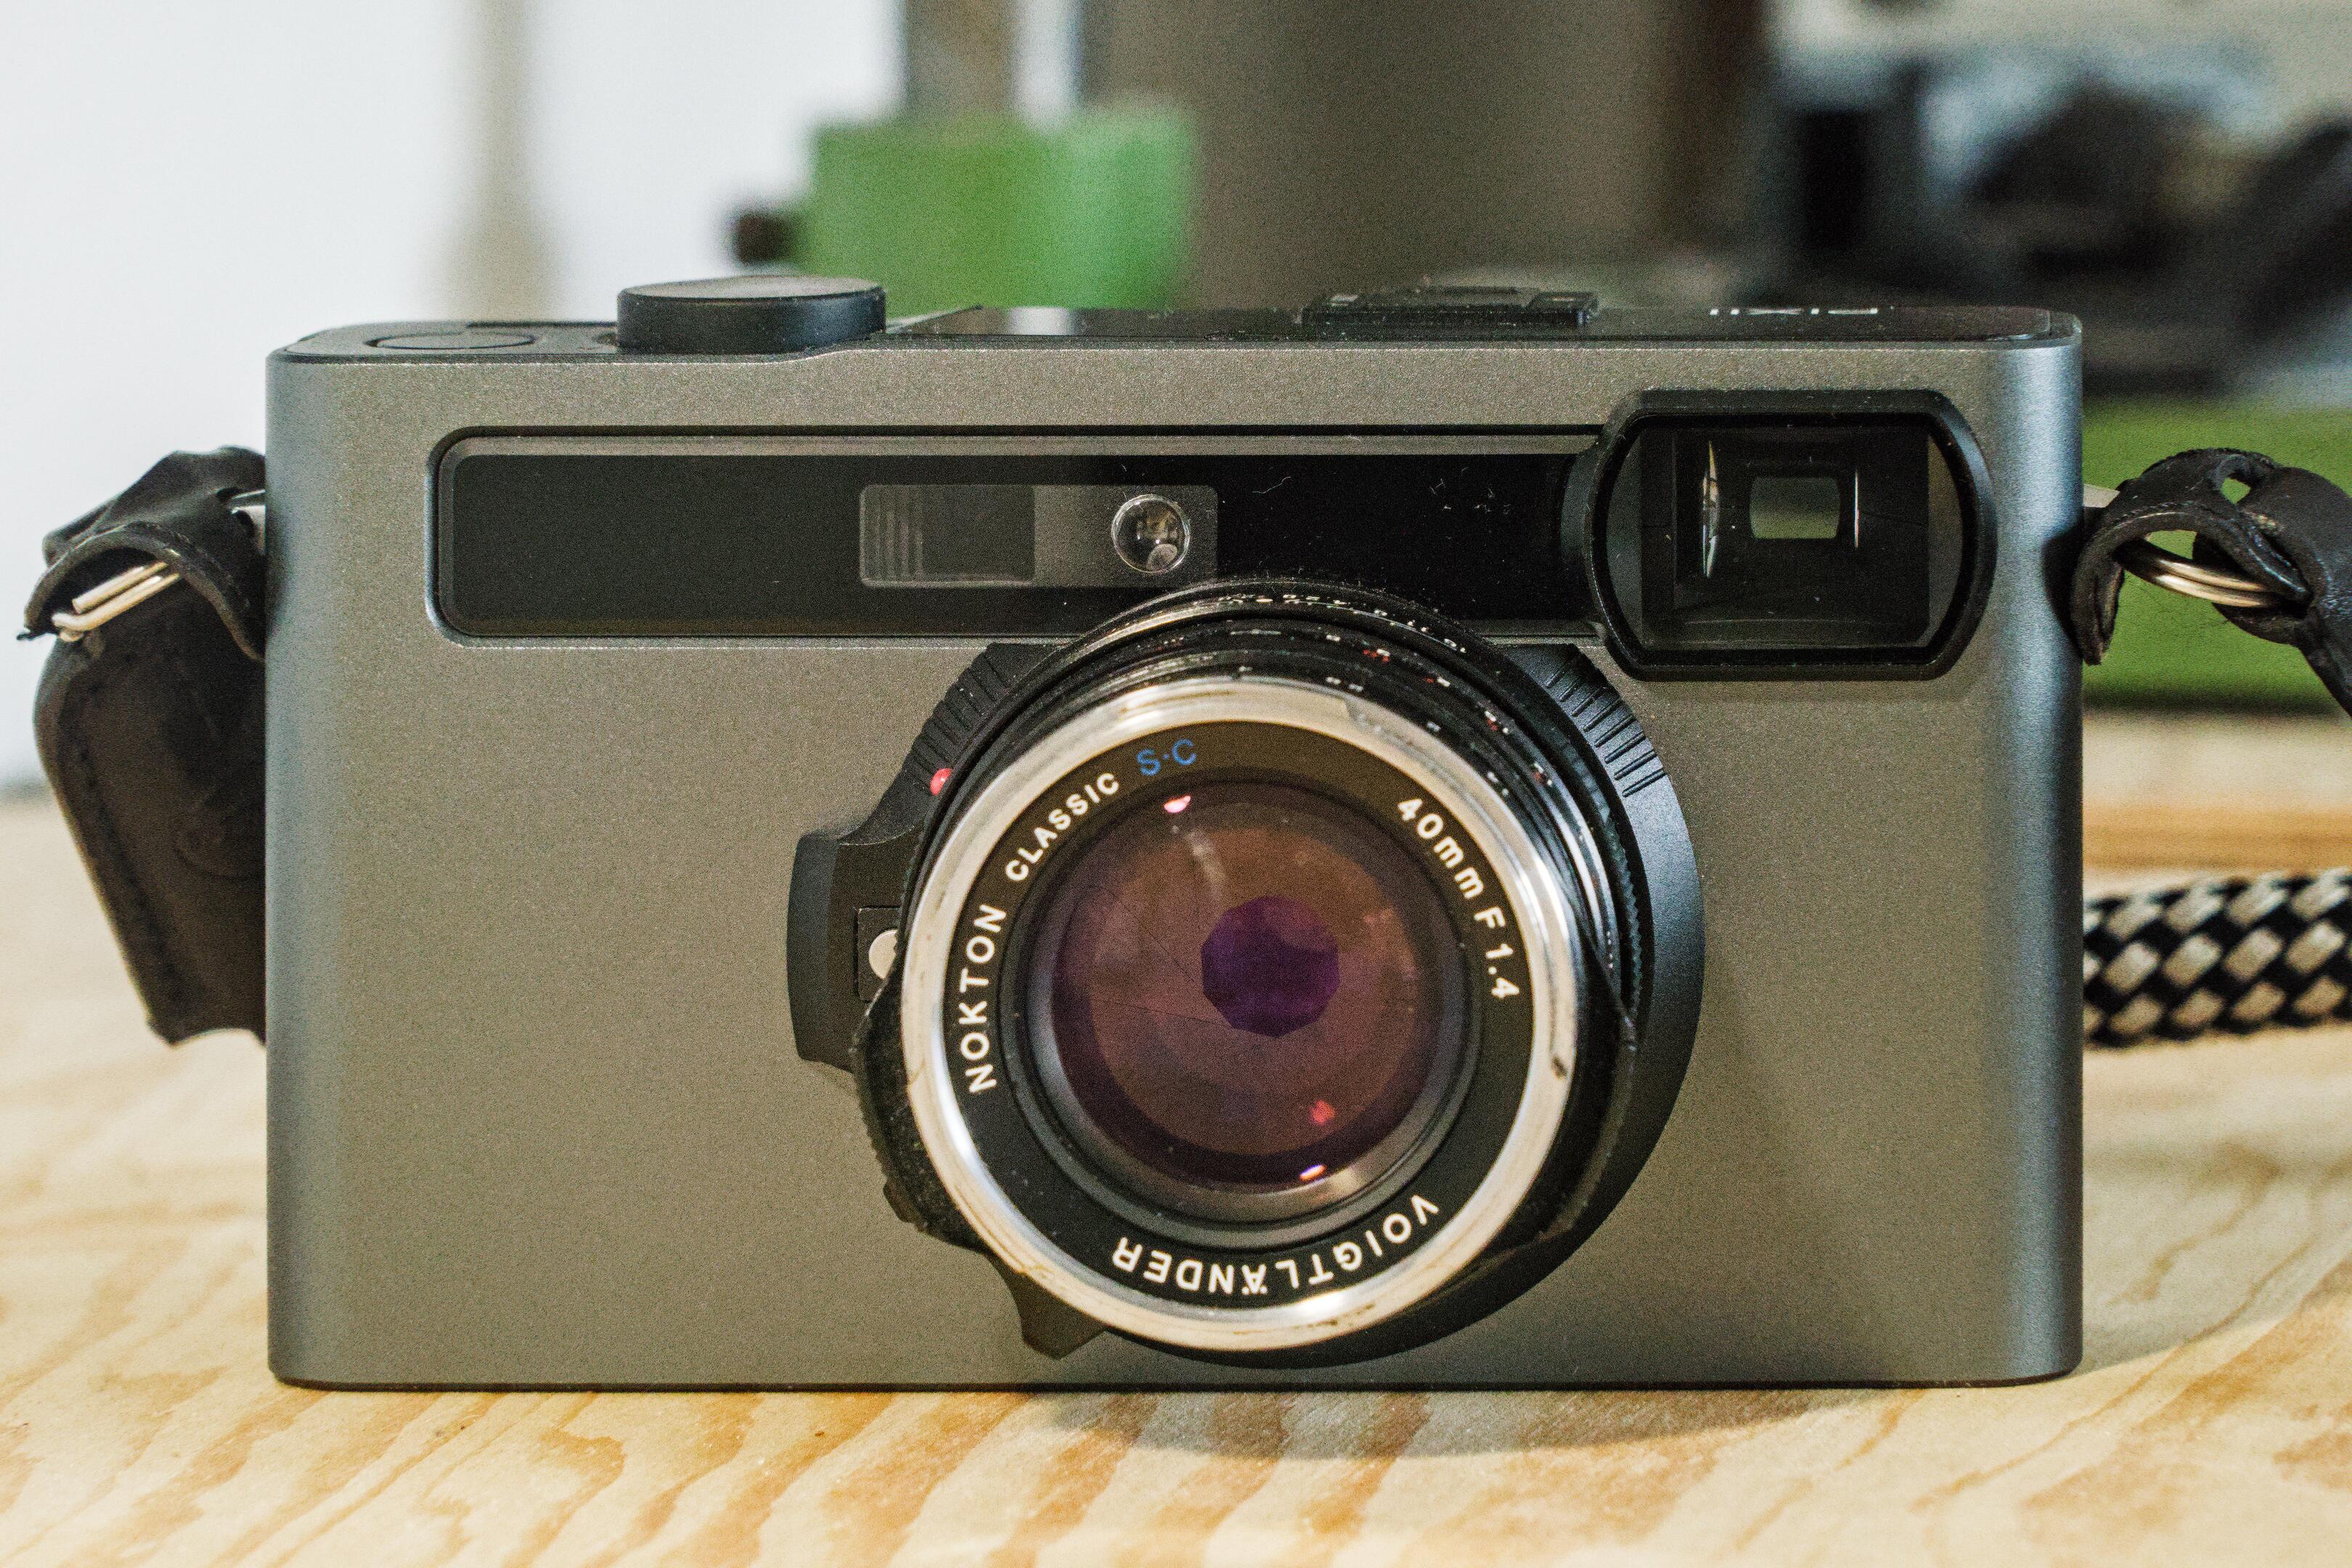
A Review of the Pixii Camera
It is so rare to hold a piece of true high tech in your hands: Modern cameras cram almost physics-defying sensors and lenses into a consumer-affordable device1. But do we need all that? That's the question asked by the Pixii camera, a boutique French camera, that foregoes most of these modern amenities and boils the camera down to the bare essentials: A lens, an aperture, a shutter, and a sensor.
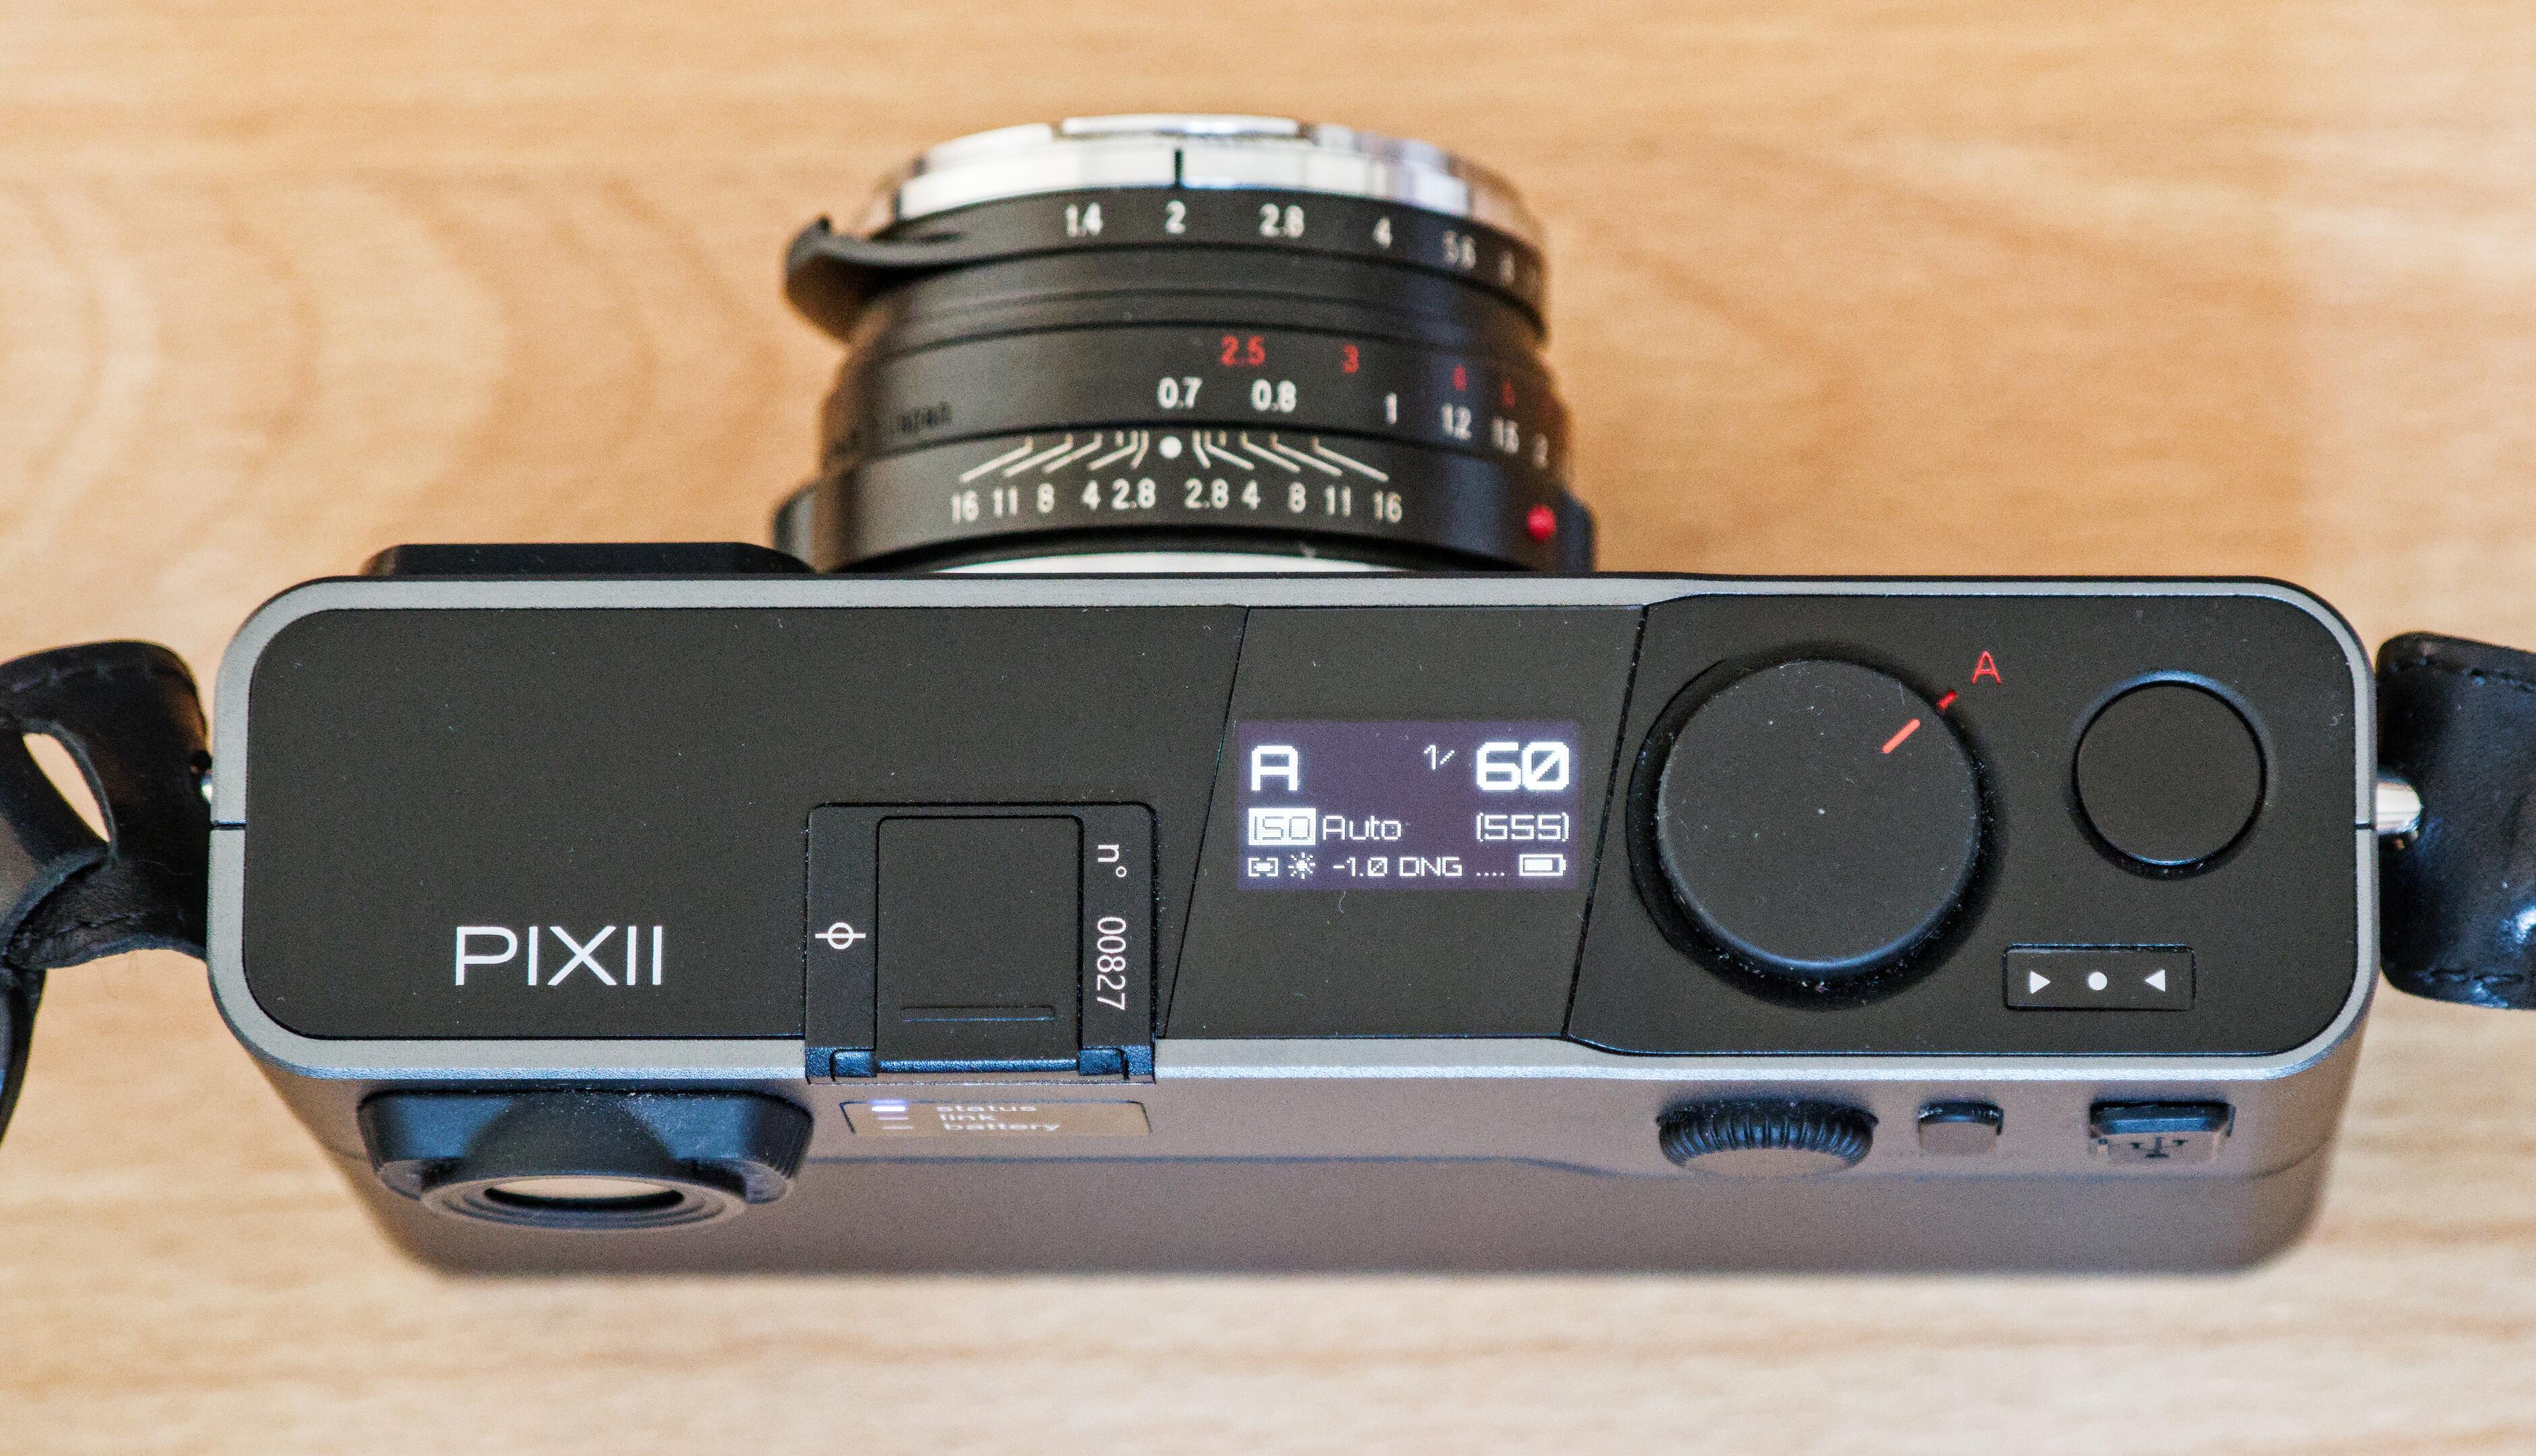
There's an aperture ring and a manual focusing tab on the lens, there's an unmarked shutter speed dial on top, a shutter button, and a menu to set auxiliary things such as your ISO, light meter settings, and file format. And that's about it.
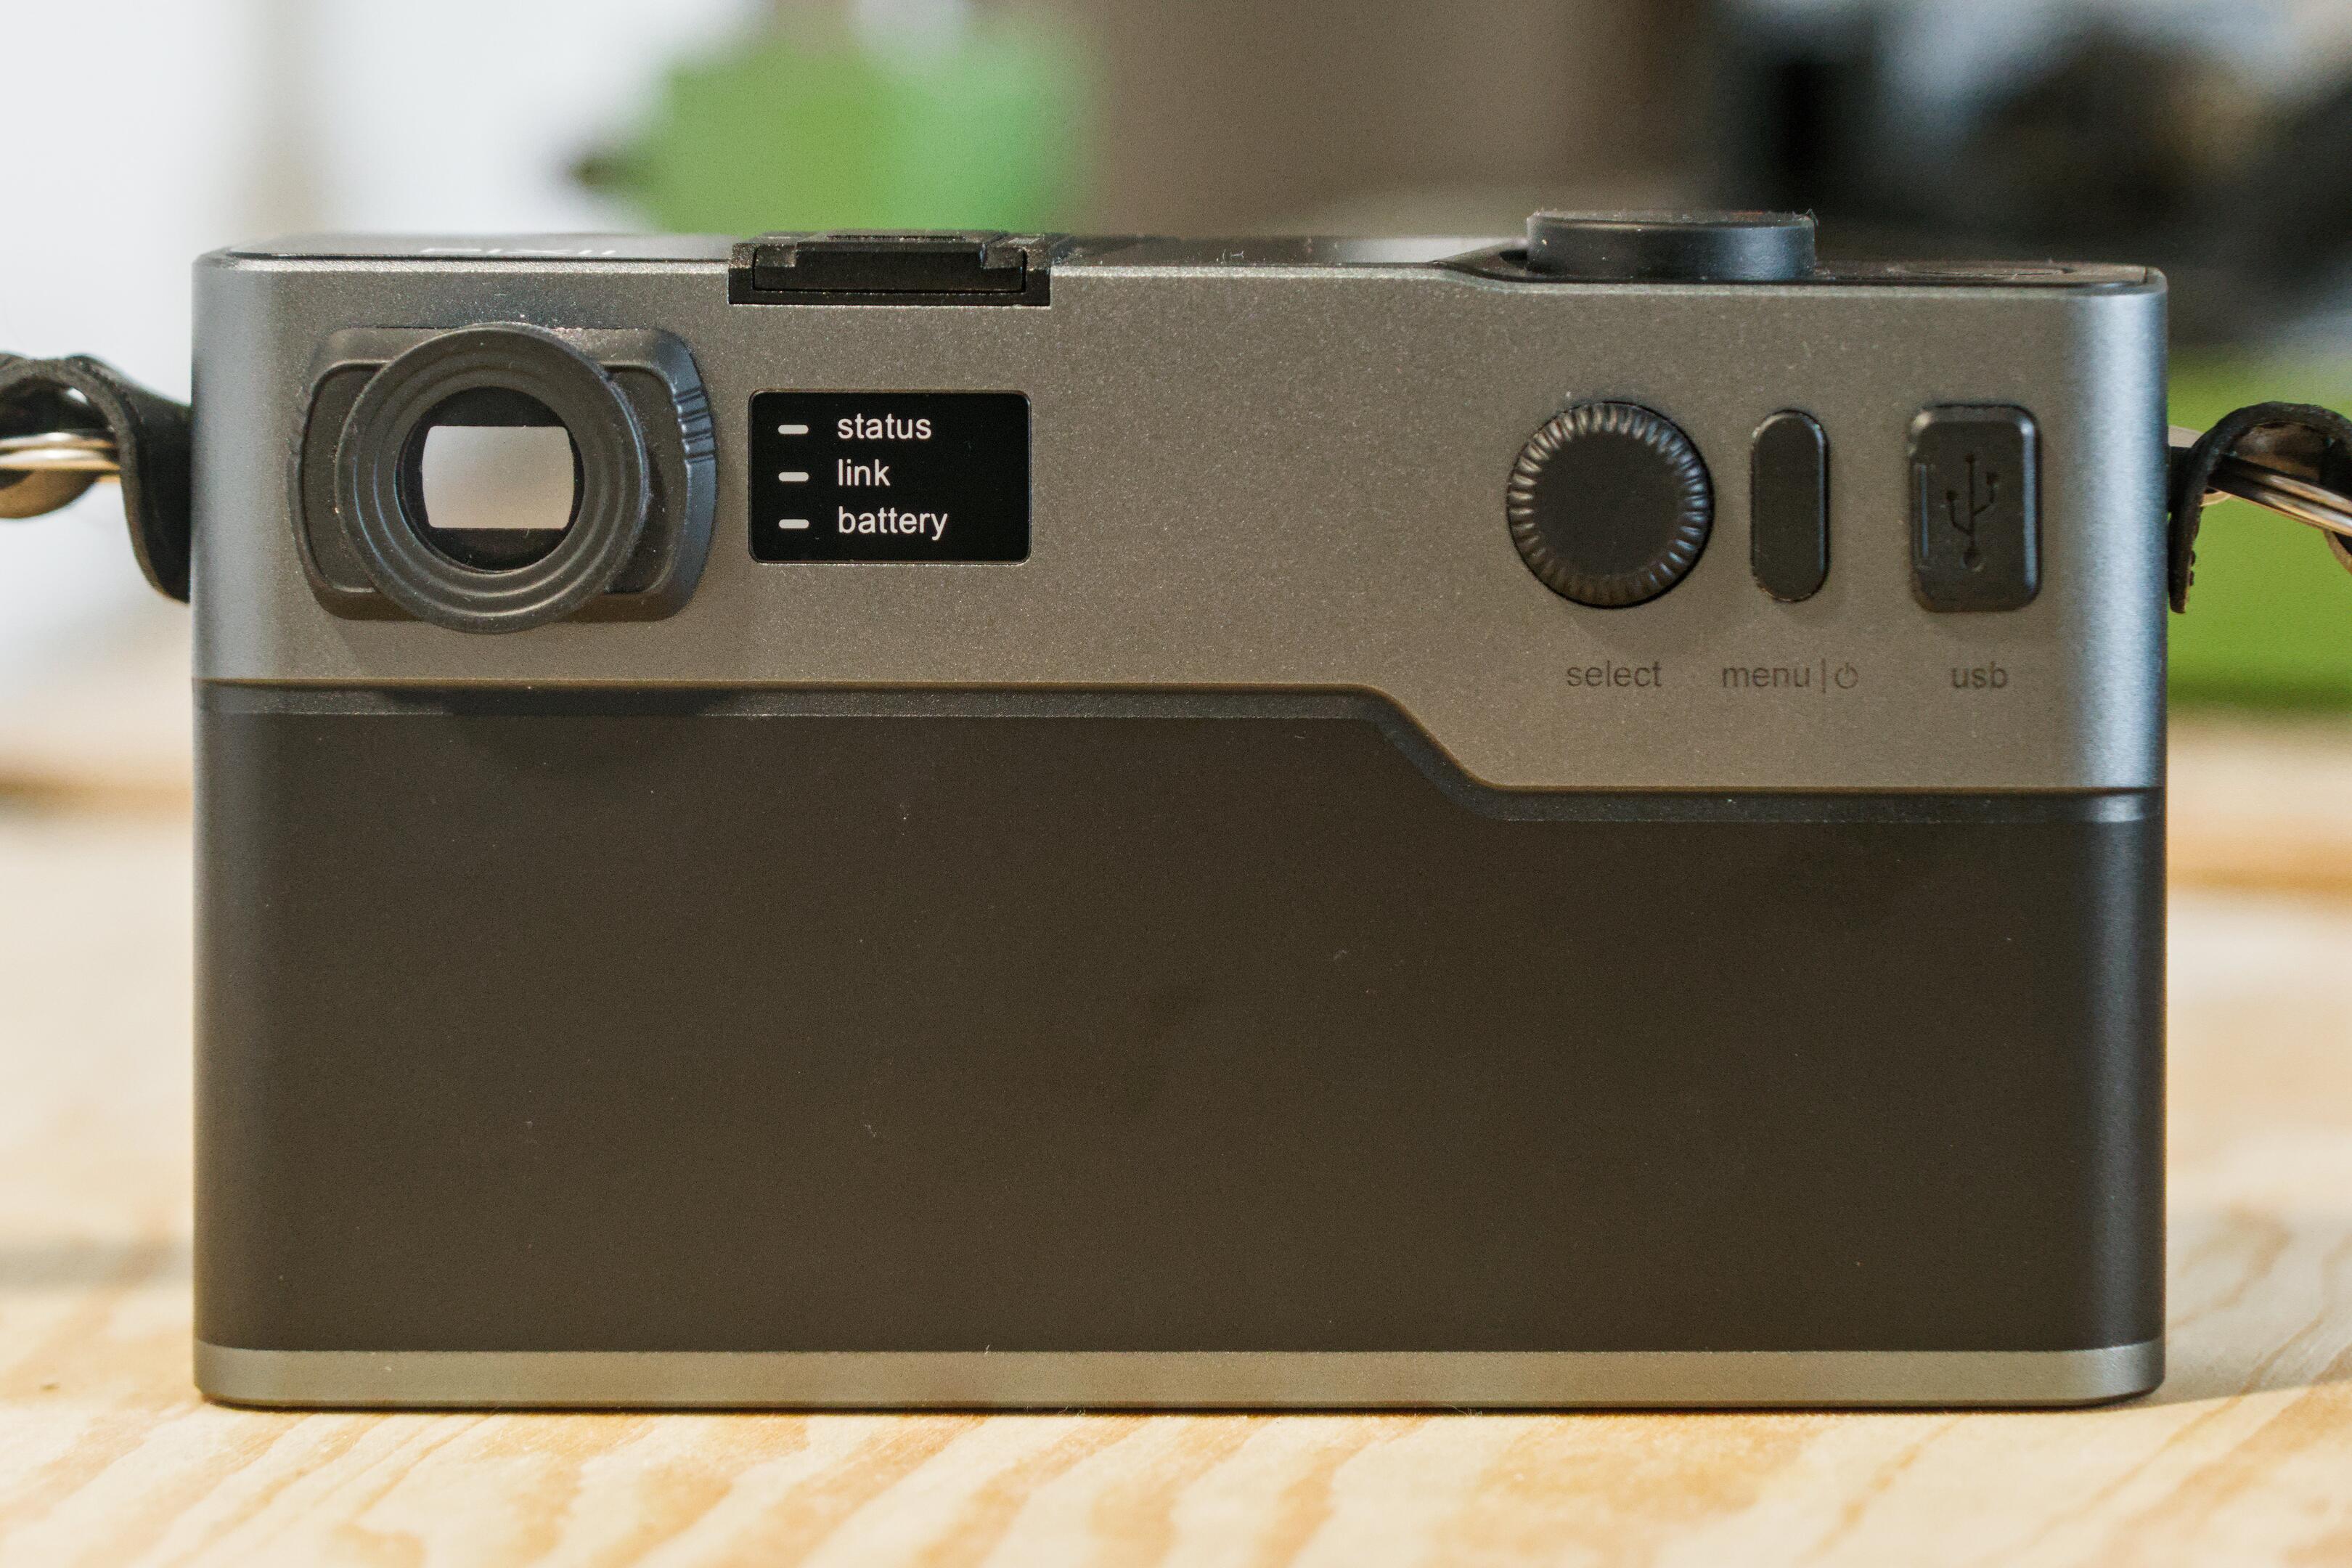
Crucially, there is no screen on the back, no autofocus, and just a window finder with an optomechanical rangefinder for focusing. It feels and acts like a mechanical analog camera, but takes digital pictures. In contrast to the otherwise-similar Leica M cameras, however, the Pixii is a very new product, introduced in 2018 by a small French company.
Camera manufacturers measure their legacy in centuries2, so a truly new camera is a modern miracle. I have been extremely interested in trying out a Pixii camera, but figured they'd be too rare to ever get ahold of one. However, the same friend and avid camera collector who last year gave me a Leica M240 to try, now found a Pixii, and graciously loaned it to me for a few weeks.
And what a fascinating camera it is: There is such a joyful simplicity to its operation. The basic verbs of photography are available as tactile dials, for focusing, composing, and shooting, but everything else is either automated or removed entirely. No screen, no chimping3, no worrying about scene modes or subject tracking or picture profiles. I like that. It's just the right kind of friction to prompt me to simplify and be present.
Of course you need to meet it on its own terms. This is not a speedy sports camera. It does take a few seconds to turn on. But shot-to-shot times are reasonable, and the shutter fires with little delay. What it tries to do, it does very well. When shooting, the camera beautifully fades into the background, and lets me focus on the light and the scene.

There are other minor gripes of course, such as the battery being a bit on the weak side, the file transfer being unnecessarily finicky and slow, perhaps the somewhat odd timing of the power button. But that's a small price to pay for a unique experience.
What is not acceptable, however, is that it sometimes randomly overexposes shots, sometimes corrupts files, and that the white balance can be so temperamental as to be useless. These are serious software issues, and it frankly gives me pause that Pixii wasn't able to fix them in the eight years since the camera has been released.
But what can I say, there is something ineffably charming about the Pixii. For reasons that I'm struggling to articulate, it is just a fun shooter. In fact, I find it more engaging than the Leica M240 I tried a year ago. Perhaps I like the more modern feel of it, the lower weight, the French quirkiness. The charming animations on its anachronistic dot-matrix LED display, and the sleek modern design.
I can clearly see what they're trying to do here, and largely agree with their goals: This is a camera that's meant to be used through the viewfinder, so a lack of labels on the buttons is not a failure of design, but a conscious encouragement to use that viewfinder. The menu system is simplistic, but makes sense when used in the viewfinder. The lack of a back screen, the simple shape-and-texture coded buttons, they all make sense. Perhaps it's this cohesion of design that so attracts me to the camera.
I have a strange affection for the Pixii camera. It is such a unique piece of kit, so full of character, and obvious love for the concept. This is surely not a camera for everybody, but it's an experience you can't get anywhere else, and that's worthy of praise. If only they could fix those digital issues I mentioned earlier, and speed up the startup process a bit, I might just buy one myself.
your camera can sense light level differences of a dozen-or-so photons, your image stabilization is only limited by the rotation of the earth, and all of that runs on a power budget that would make your phone blush in shame.↩
the otherwise newest photography companies were probably Sigma from 1961 and Sony from 1946 – perhaps excluding Phase One from 1993, which mated Phase One's original digital sensor with Mamiya's heritage in optics and mechanics.↩
that's reviewing your every picture on the screen to make sure everything's ok.↩
Linux on the Framework Desktop
I've been feeling unmoored lately. I changed roles at work, from a very comfortable programming position to a challenging new management role. At the same time, AI is threatening to take away the fun part of programming, and leave my profession a hollow shell. So when I relax and edit photos after work, it is with some pent up anxiety and insecurity.
Thus when Apple added their latest “liquid glass” insult to the injury that is modern macOS1, it was the straw that broke the camel's back. I decided it was time to try the grass on the other side, and bought a Framework Desktop. That's a very fanciful small form factor computer that should combine great power in a compact and quiet case. Essentially the PC equivalent to my Mac Studio.
In particular, I bought this computer specifically to run Linux. My first try with Fedora KDE went poorly. But the second try with Ubuntu 25.11 resulted in a very pleasant system!
Compared to the Mac, GNOME was a breeze to customize to my liking. I replaced the built-in Ubuntu Tiling Assistant extension with the Tiling Shell extension, to get ❖-Left/❖-Right window snapping to work across multiple screens, and installed Touchpad Gesture Customization for quad-swipe-up to enable the window switcher. Beyond that, the dock was already on the right, where it should be (*cough* Microsoft), the file manager was fast and simple, and the whole system just worked very well and looked fairly good. All my hardware worked immediately. This was actually the nicest desktop environment I've used in a long while.
Of course there were details that annoyed me a bit. In particular, many apps could only spelling-correct a single language. Mouse acceleration was different from what I'm used to. More annoying was that the computer would not wake from sleep on USB input, if I had switched my KVM to a different source while it was asleep. I'm sure this could be fixed, but I didn't get to it. Well, and since I couldn't wake the computer by just mashing a few keys on the keyboard, I had to crawl under my desk to find the power button on the Framework Desktop, and it is not a good button: it can't be located by touch, wobbles a lot, and just feels cheap. A minor detail, but I felt it daily.
Installing apps was straight-forward. Most apps were either available in the repo or as flatpacks, including Zen, Spotify, Darktable, Thunderbird, Obsidian, DigiKam, Publii, Zed, Signal, and Telegram. There were minor gripes such as the odd window frame not looking right, but that's not something I get hung up on. Only three applications required a VM, for banking, scanning, and photo printing. This was expected, and fine. Affinity was the only application that I'd really need to find an alternative for, but I don't foresee much of a problem with that.
In terms of hardware, the Framework Desktop is a very nice machine. Perhaps I'd have preferred a few more USB ports, and a bit more style than a simple black box. But at the end of the day, it was simply sitting under my desk, and it's certainly pretty enough for that. The fan kept quiet at all times.
Performance was good, but not much of an upgrade over my current setup:
| Task | Framework | Mac2 |
|---|---|---|
| Darktable 61MP benchmark export | 3.4s | 6.0s |
| Darktable 61MP benchmark interact3 | 0.30s | 0.25s |
| Darktable 24MP benchmark export | 1.2s | 1.2s |
| Darktable 24MP benchmark interact3 | 0.45s | 0.25s |
| Task | Framework | Handheld4 |
|---|---|---|
| Gaming: MSFS2020 high preset5 | 35 FPS | 30 FPS |
| Gaming: MSFS2020 medium preset5 | 45 FPS | 40 FPS |
| Gaming: System Shock medium preset | 25 FPS | 35 FPS |
These are not fair performance comparisons, but they represent how I use my computer. The Framework did of course run games a bit faster than my handheld, but only 50% more frames for 4x the TDP was less than expected. Darktable performance was actually a bit of a downgrade to my Mac, probably due to relatively poor driver support for OpenCL6. But all of that is fine.
Overall, it has to be said, the Framework Desktop turned out to be an awesome system! It does everything I'd hoped for, while being small and quiet and unobtrusive. Truly a great machine.
But, through all of this ordeal of installing Fedora, seeing it break very disconcertingly before my eyes, setting it up again with Ubuntu, figuring things out, blogging about it... I wasn't having fun. This new computer was actually wonderful, but it did not fix my annoyance with computers in general, nor my general unease with the direction the tech industry is going. This is of course perfectly obvious in retrospect, but wasn't apparent to me when it overlapped with various other annoyances.
So, a big fat recommendation for the Framework Desktop, and Linux on the Desktop, if that's your jam. But the Framework Desktop was a complication I didn't need, so I'll stick with MacOS for the time being, and work through my other problems first.
I have a long history of bitching about Apple computers (2012, 2015, 2020, 2020, 2026).↩
A Mac Studio M2 Pro with 32 GB of memory, my previous computer.↩
The time it takes to change the first exposure instance, as measured by
darktable -d perf.↩A Legion Go S Z1 16G running SteamOS. I play almost exclusively on the handheld, but was considering streaming from the Framework to the handheld for more demanding titles.↩
On the Framework, at 50% resolution scale (1080p), on the handheld, at 66% resolution scale (720p). That's not a fair comparison, but it's how I'd play them.↩
That's with the RustiCL implementation, and pinned memory enabled. ROCm was significantly slower.↩
🔥 This is not fine 🔥
So I was annoyed with my Apple computer, and decided to try Linux again. I even got a fancy Framework Desktop to do it!
After a week, the hardware arrived. To be honest, I was a bit under-whelmed. It's a cute little black box, but at the end of the day, it is just a black box. Somehow I had hoped it would look a bit more classy. Oh well. At least it's very quiet.
Since I wanted color management in Linux, KDE is the only option until Gnome 50 is released next month. So I installed Fedora KDE. This worked well. All my hardware worked immediately, including the odd headphone amplifier, the weird flightsim controller, and the Apple touchpad. Even the two 4K160 P3 screens came up correctly without issues. Weirdly, the GPU was configured with merely 512 MB of memory by default. But a quick trip to the BIOS fixed that.
Much more annoying was installing apps. I like to use Darktable, Digikam, Signal, Spotify, Zen, and Zed. Installing these required installing AppImages, Flatpaks, and the odd RPM repo, and even hand-editing a few desktop shortcuts. I can deal with this, but elegant it is not. The rest of the software was of course trivially installed from the package repos.
Steam and games worked immediately without any trouble. But gaming performance in Microsoft Flight Simulator was merely good, I had hoped for a bit more.
Performance in Darktable was a bit of a letdown. I had thought the Framework Desktop would clearly outclass my Mac Studio M2. But it didn't. It was slower. After messing with stuff for a while, I found that the RustiCL runtime ran faster than RocM once you set up the environment variable. Fine, be that way. Not the end of the world.
I was less amused about KDE. This was my preferred environment in the past, but even compared to Liquid Glass, it was a bit of a mess. Why are some directory icons monochrome, and others colorful? Why are font sizes and rounding radii and colors inconsistent everywhere? Why do some apps scroll with inertia, and others don't? Why do apps crash frequently? I am apparently spoiled by MacOS.
Meanwhile I noticed that the computer did not recover from sleep correctly. USB would wake it, but then immediately die, so I couldn't enter my password and resume my session. I futzed with GRUB params and udev rules, but that didn't fix anything.
Then I wanted to set up a home banking app. I knew I'd have to use a Windows app for that, and thought Wine should easily be able to handle them. It. Did. Not. After a few hours of tinkering, I gave up. Alright, a VM then. I'd need one for printing and scanning anyways. So I tried to set up VirtualBox.
At this point the plot finally turned. Fedora does not include VirtualBox in its repos. There is hardly any documentation for anything on VirtualBox's website. Meanwhile the third kernel update had installed, and this time it apparently broke the GPU driver. God damn it, I just want a running computer, not a tinkering box. And why do reboots take a long time?
Look, I really wanted to like this. But I'm already fighting with computers eight hours a workday, I don't need this shit at home. I'm not giving up just yet. I have now installed Ubuntu 25.10. It doesn't have proper color management yet, but that's only temporary until 26.04 releases. I'm still trying to make this work. But my patience is close to running out.
Apple: enough is enough
Yesterday, my wife wanted to use Discord on her Apple laptop. It was right there in the applications folder. But MacOS couldn't find it. Launching it manually took several minutes, for some reason.
We wanted to download a clip using yt_dlp (a Python program). Terminal told us, this would require dev tools (which it doesn't). So we installed Python from python.org instead, which worked. Except, that non-blessed python could not access the internet because of some MacOS "security" feature.
Another "security" feature requires all apps on Apple computers to be notarized, even the ones I built myself. This used to have a relatively easy workaround (right click, open, accept the risk). Now it needs a terminal command.
I maintain a python library for playing and recording real-time audio from the system's sound cards. On some Apple systems, this fails to show any audio devices, "for security reasons".
I live and work in a multi-lingual environment, and regularly switch between the German and English keyboard layout. Lately, the keyboard layout no longer sticks. It resets to English when I press shift. Sometimes it does work, sometimes it doesn't.
The German keyboard layout for MacOS on non-Apple keyboards is insane. So I made my own layout. This is relatively easy, and worked well. Except, every few OS updates, it reinstates Apple's insane layout.
Sometimes my Mac does not wake from sleep. Pressing the power button does nothing. Hitting keyboard keys does nothing. Only a long-press of the power button eventually reboots it. The power button on the Mac Studio is in an insane place of course.
There is no indication anywhere that the hard drive is getting full. Edit: A commenter pointed out that as of 2022, there is at least a Storage page in System Settings → General → Storage. Better than nothing.
There is no simple way to reset the computer to factory conditions. Edit: A commenter pointed out that this does exist as of 2021, in System Settings → General → Transfer or Reset → Erase All Content and Settings....
Gaming is largely impossible, even though the hardware is very capable.
Apple computers ship with a backup program called Time Machine. Except Time Machine invariably corrupts its own backup after a few months. Sometimes this can be recovered with some command line surgery, sometimes it can't. In which case, the backup needs to be rebuilt from scratch, and all previous history is lost. I have observed this on many Apple computers with many Time Machine volumes, from Apple's own hardware to external hard drives, to network drives. The only reliable option is to not use Time Machine.
Mac OS is getting less user friendly and usable with every release. Previously, when you renamed a file in Finder.app, Apple's anemic file manager, the file would not immediately re-sort, but wait a second, so as to allow me to arrow over to the next file. This was useful, but it was removed. I won't even explain the new "liquid glass" design.
Suffice it to say, I have ordered a Linx PC, which will replace the Mac. I've had enough. It will require wine for two apps, and a VM for two others. At this point, that's a price I'm willing to pay.
