RAW Developer Comparison
It bit me again: I got software envy. What if I could develop my pictures faster with a different RAW developer? What if they looked better than they do now? Questions like these keep me up at night.
The Problem
Choice. There are so many RAW developers out there. And they all have rabid fan bases, and apparently unique rendering. How to choose?
Here are my house rules:
- Must run on Windows or Linux
- Must run acceptably on my Surface tablet
- Must run acceptably with files on a network share
- Must support my past and present cameras (Fuji X-E3, Ricoh GR, Pentax Q7, Nikon D7000)
In contrast to most other comparisons on the 'net1, I won't concern myself too much with sharpness and noise reduction and demosaicing. I have yet to see a photograph that was ruined by them, and most RAW developers seem to do a sufficient job at them.
I would prefer a file-based workflow with edits stored alongside the RAW files2, and I would prefer a perpetual license instead of a rental contract, but I'm willing to compromize on both if it's worth it3.
Obviously, I am a lot more proficient in my current tool, Darktable, than in any of the others. But for this test, I'm explicitly not doing anything particularly artistic; merely some highlight recovery, shadow recovery, and local white balance adjustments. By limiting myself to these edits, I hope to get an unbiased idea of the various RAW developer's implementations, without needing to ask the endless “what if” of what else I could have done. That said, I will leave all other adjustments on their default settings, to still get an impression of the general look of the programs.
The Contestants
- Darktable 3.0.2 (Free)
Free, works on Linux, very familiar to me. Allegedly, not particularly fast, with a confusing user interface. - Adobe Lightroom Classic CC 7.5 ($10/month)
Probably the most widespread tool. Somehow unappealing to me. Currently only available at a subscription price, but there is a “free” version available through my university. - Capture One 20.0.4 (\(29/month or \)350)
Enormously expensive, even with the educational discount. Allegedly the best default color rendition, particularly for Fuji cameras. - RawTherapee 5.8 (Free)
Free, works on Linux. Allegedly extremely high image quality, but no local adjustments whatsoever. - Luminar 4.2.0 ($90)
A rather new developer, with fancy AI features such as automatic sky replacements. Not exactly what I'm looking for, but we'll see about its “normal” RAW development chops. - ON1 Photo RAW 2020.1 ($100)
Another highly regarded developer with rather traditional tools. This one works straight on files in the file system, though, which is highly attractive to me. - ACDSee Photo Studio Ultimate 2020 13.0 (\(9/month or \)150)
Wasn't this a fancy image viewer a few years ago? Apparently it's now a RAW developer. - Exposure X5 5.2.1.211 ($120)
Allegedly super fast, with great sharpening and noise removal. - Photo Ninja 1.3.7a ($130)
Another new developer, borne out of a dedicated noise reduction tool, and with an emphasis on “intelligent” tools. - Silkypix Developer Studio Pro 10.0.3.0 ($200)
A Japanese RAW developer. I wasn't aware of it until a comment brought it up, thank you for that! And I mention its country of origin, as the English translation is a bit rough sometimes. Quite unusual in its feature set. - Zoner Photo Studio X 19.2103.2.317 ($50/year)
A somewhat unknown RAW developer. So much so that I only stumbled upon it one year after the original article. A true Windows-only product that feels at home in Windows like none of the other programs in this list. - DXO Photolab ($220)
For the longest time, did not support Fuji X-Trans files. But this has changed in version 5, and I am eager to try it out!
Not considered:
- Aftershot ($80)
Works on Linux, but doesn't support my Fuji camera because it hasn't been updated in ages. - Iridient Developer, Raw Power, Aperture
Mac only - Affinity Photo ($55)
Cheap, awesome, but not non-destructive. I'll probably buy this regardless in a sale, just because it's so affordable.
In terms of price, it is hard to argue with free. But considering the price of my other photographic equipment, most prices in this list are pretty adequate. Except for Capture One (and maybe Silkypix). \(350 (\)200) is a hard price to swallow.
The Test
I prepared 18 RAW images for this test, and made a plan of what exactly I would do with every one of them. Then I developed them all in each of the RAW editors. I will only show excerpts here, both to keep private the pictures I don't want to share, and to keep this already long post from exploding.
Also, I mostly show difficult files here that have some obvious challenge. This is because I am usually quite satisfied with my cameras' JPEGs in easy cases, and don't bother with RAW development.
Highlight Recovery
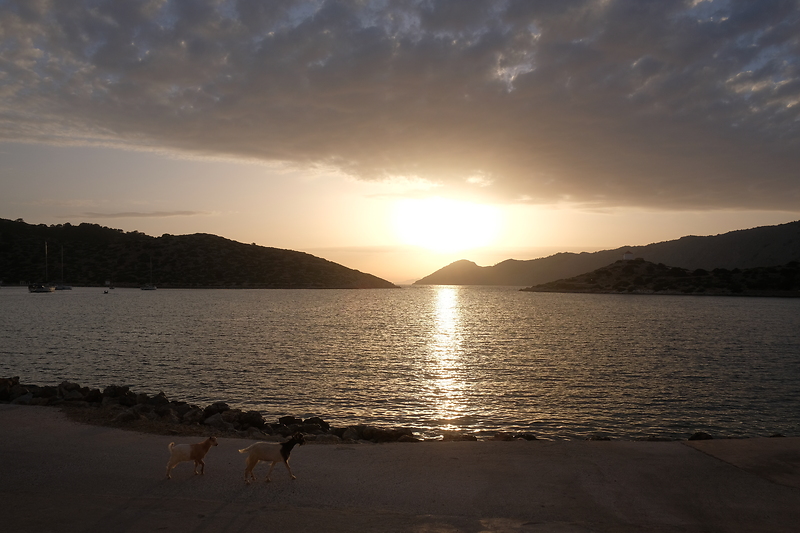
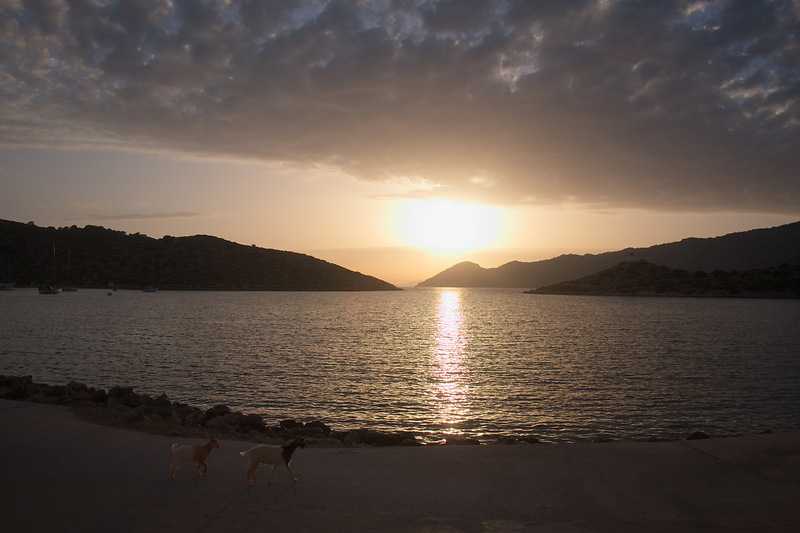


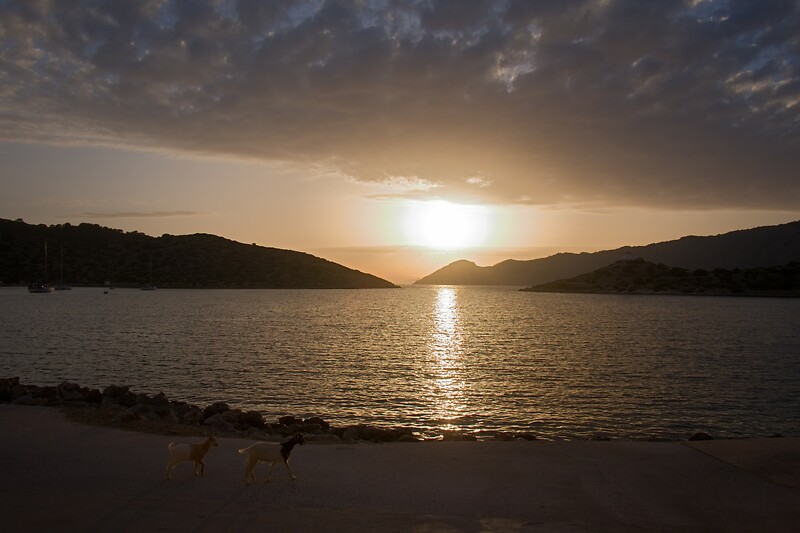

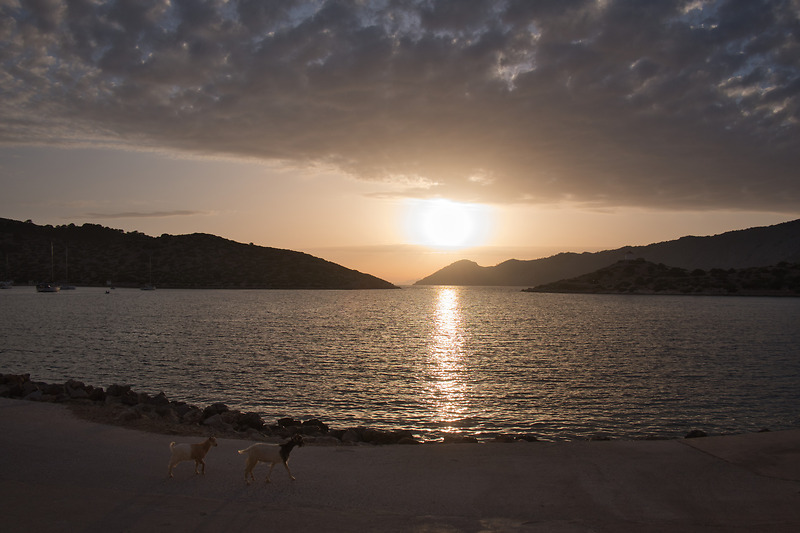
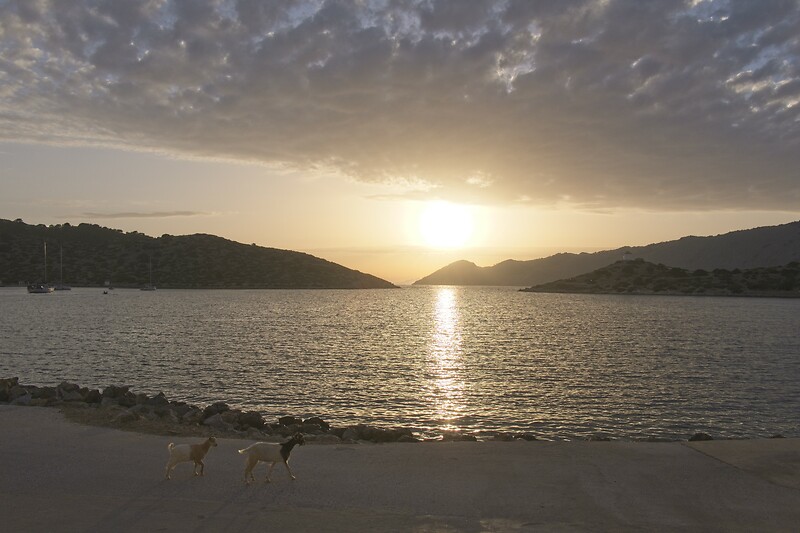
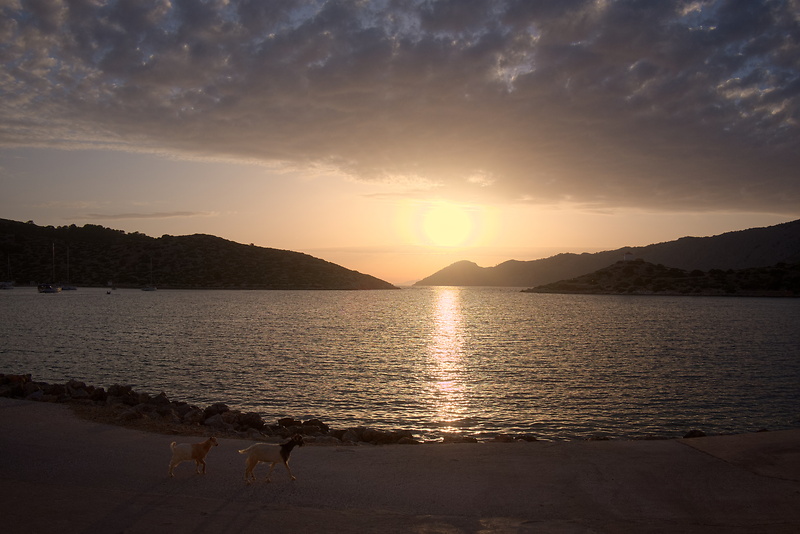


📂 DSCF3861.RAF (23.0 MB) 
A shot of the sunset in Greece, with both the sun and its reflection in the water blowing out. I want to lower the highlights, and boost the shadows a bit. The transition from sky to sun should be smooth without lightness reversals or rings. The transition from water to reflection should have no color cast. The hills in the background should not show any halos.
Capture One, Lightroom, and DxO show the smallest sun without artifacts. RawTherapee, Darktable, ACDSee, Silkypix and Zoner produce a smooth transition, but a bigger sun. In Luminar, Exposure, Photo Ninja, and ON1 the sun is smaller, but has a distinct ring around it that looks wrong. In RawTherapee the sun is big and slightly ringed. Actually, Capture One and Silkypix also have a ring, but so faint that it wouldn't matter to me.
The reflections in the water are artifact-free in Darktable, Lightroom, Exposure, RawTherapee, and Zoner. The other developers show magenta artifacts to varying degrees, and DxO has some false-color pixels (their X-Trans support is still in beta). In terms of detail, Capture One, Lightroom, DxO, and Exposure recover a bit more wave details in the blown-out reflections.
The hills in the background show distracting halos in Capture One, Lightroom, and Exposure.
In the following list, the RAW developer name links to the sidecar file, if there is one:
- Camera: Dynamic Range 400
- ACDSee: Highlights 100, Fill Light 25
- Darktable: My Defaults, Filmic RGB to shift dynamic range to include highlights, Highlight Reconstruction LCh and lower until magenta halo disappears
- Capture One: Highlight and White -100, Shadow +20
- Exposure: Highlights -100, Whites -50, Shadows +50 (less Whites desaturates)
- Lightroom: Highlight -100, Shadow +50
- Luminar: Highlights -100, Whites -50, Shadows +25
- ON1: Highlights -50, Shadows +25 (More Highlights produce lightness reversals)
- Photo Ninja: Illumination 27, Exposure offset -1.62, Highlights -0.50 (all chosen automatically)
- RawTherapee: Highlight Compression 250, Highlights 100, Shadows 25
- Silkypix: Highlight Dynamic Range +3, Hue 100
- Zoner: Lights -50, Shadows 25
- DxO: Highlights -100, Shadows 25
While a bit of a pathological image, there are clear differences in how these RAW developers handle it. Really, only Darktable, DxO and Lightroom produce a truly pleasing image for me, with second place to Capture One, ON1, and Silkypix. Surprisingly, the camera's own JPEG is amongst the best renditions as well.
Silkypix deserves a special mention, though, as its highlight control tool has a fantastic Hue slider, which trades off higher saturation against more accurate hue. Which is exactly the tradeoff that underlies all the rings and magenta artifacts in all the other programs.
On a side note, I have never quite understood why nobody seems to complain about the obvious haloing in Lightroom. I see it in almost every high dynamic range landscape shot on the internet, and I do not enjoy the look. But apparently I'm alone with this.
Dynamic Range Reduction

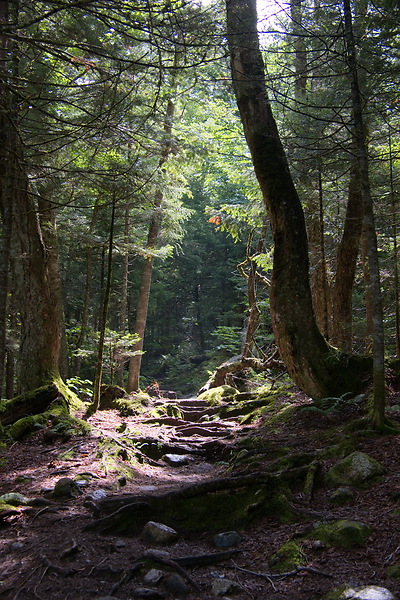

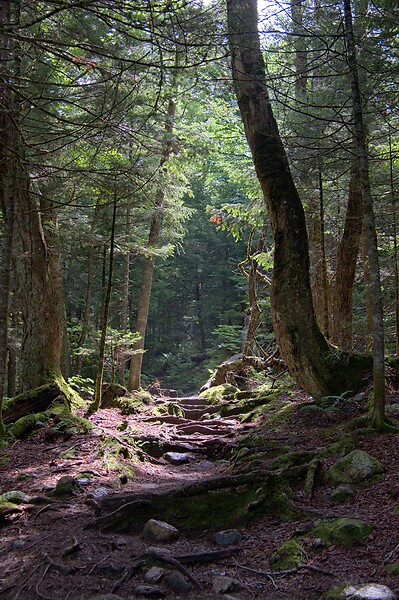
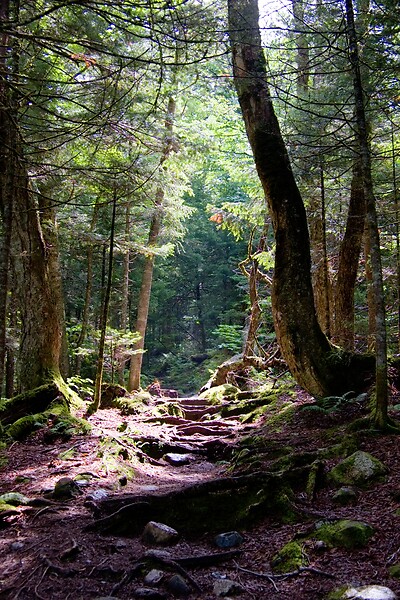
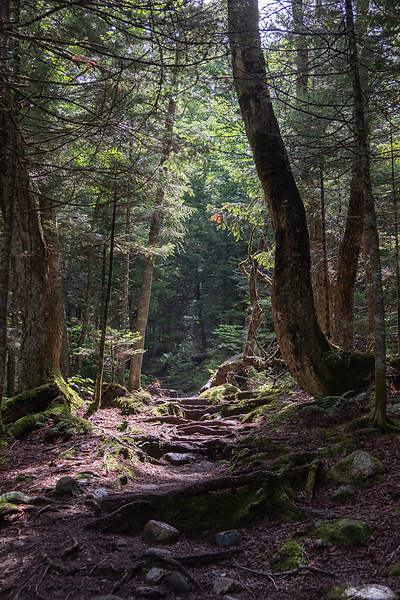


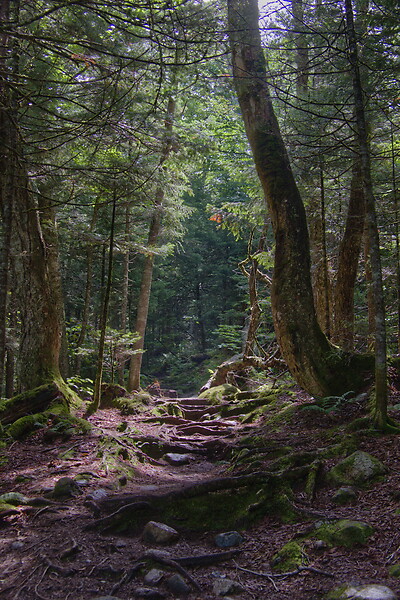


📂 DSCF6535.RAF (21.6 MB) 
A shot of a very contrasty forest scene at Mt. Washington, with highlights slightly blowing out, and shadows close to drowning. I want to lower highlights and raise shadows, without it looking crushed or unrealistic.
The most important thing in this picture is to maintain a realistic progression of tones, even though the dynamic range is crushed beyond reason. To my eyes, Lightroom really stands out here, with a three-dimensional look that no other developer can match. ACDSee, Darktable, ON1, Photo Ninja, and RawTherapee come second, with a believable progression. Exposure, Luminar, and Capture One seemingly applied some kind of local contrast compression that destroys the balance between highlights and shadows and flattens the image.
All developers show magenta artifacts on the bright forest floor to some degrees. They are particularly unpleasant in Capture One, Darktable, ACDSee, and Exposure.
- ACDSee: Highlights 100, Fill Light 25
- Capture One: Highlights -50, Shadows +25, Black +50
- Darktable: My Defaults, Filmic RGB to expand dynamic range
- Exposure: Highlights -100, Shadows +50, Blacks +25 (Blacks and Shadows interact weirdly)
- Lightroom: Highlights -75, Shadows +50, Blacks +50
- Luminar: Highlights -100, Whites -50, Shadows +50, Blacks +50
- ON1: Highlights -75, Shadows +50 (disable Recover Highlight Hue to prevent color fringes)
- Photo Ninja: Illumination 25, Exposure offset -1.47, Highlights -0.50 (all chosen automatically)
- RawTherapee: Highlights 50, Shadows 25, Dynamic Range Compression 50
- Silkypix: HDR 50, Exposure -2/3
- Zoner: Lights -75, Shadows 25, HDR Lights 25%, HDR Shadows 10%
- DxO: Highlights -75, Shadows 25, Blacks 10
In terms of tools, I like the explicit dynamic range slider in Darktable, RawTherapee, and Silkypix better than the shadows and highlights sliders in the other tools. But if calibrated well, both methods can result in a pleasing image.
To my eyes, Lightroom, DxO, RawTherapee, Photo Ninja, and Zoner take the crown in this shot. But I expect that the tone progression could be improved in the other tools as well if I strayed beyond the default tools.
Local White Balance

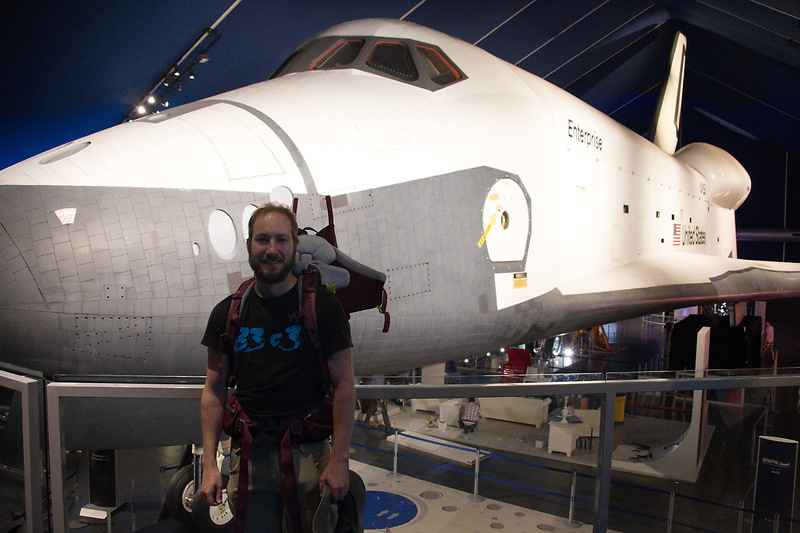
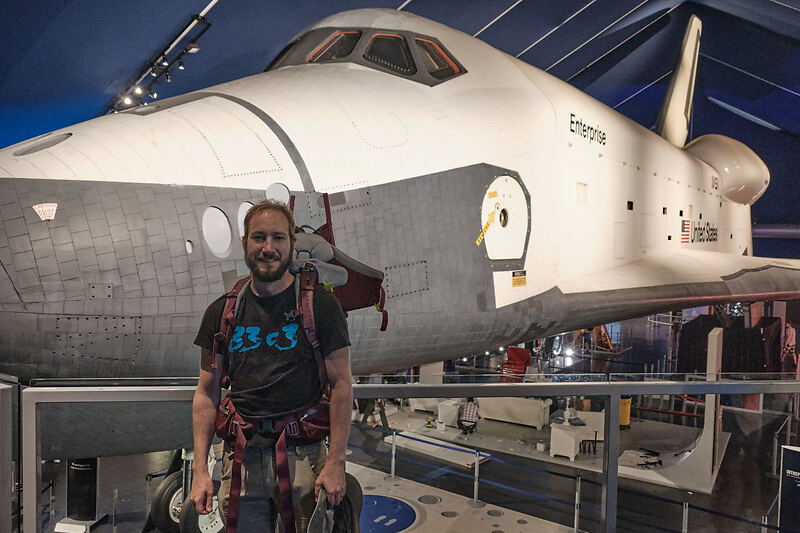
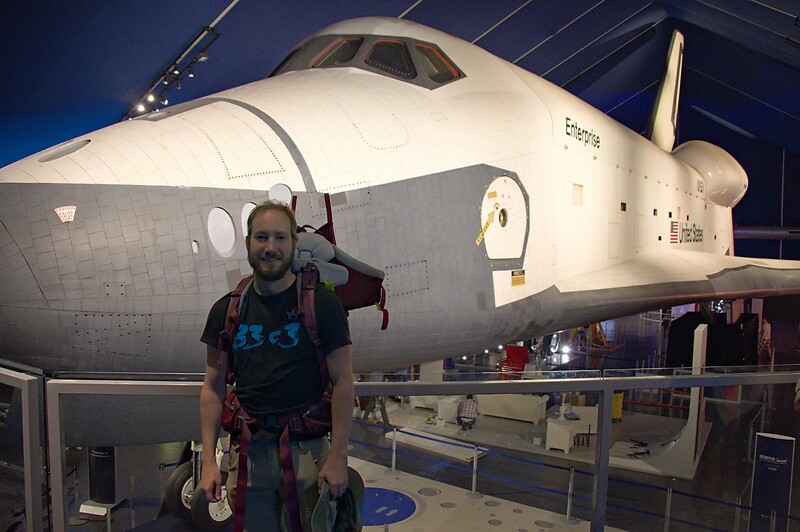


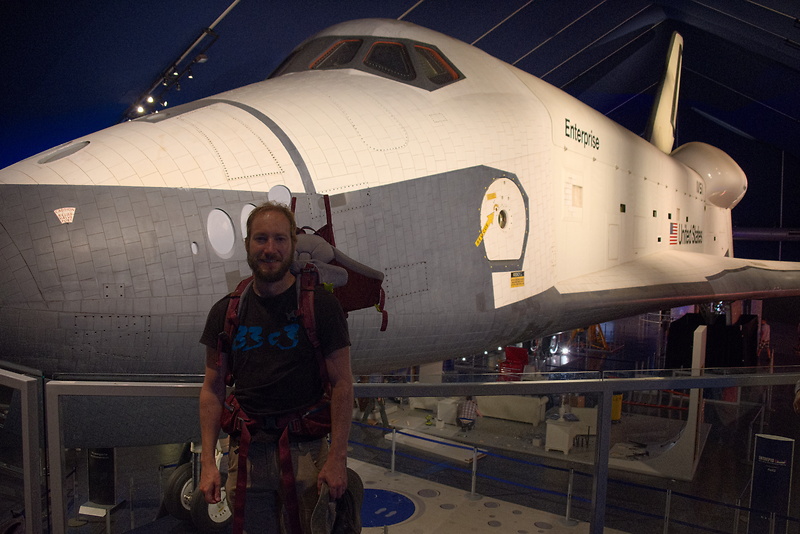
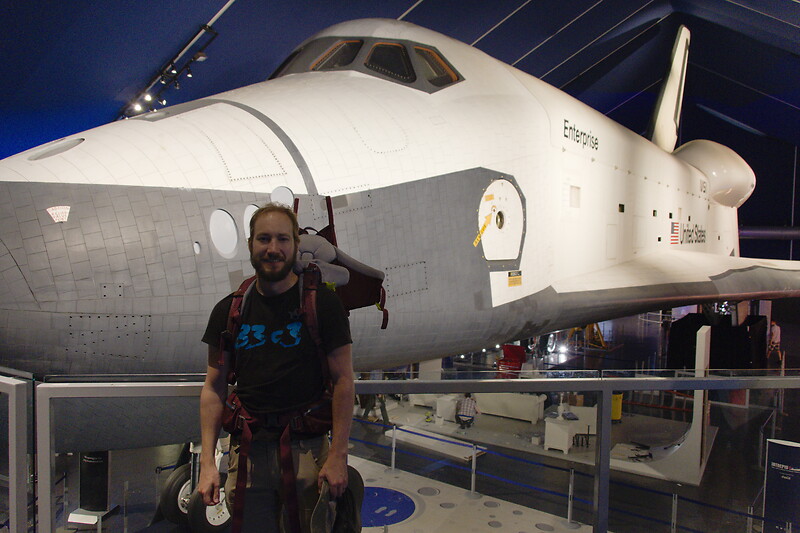
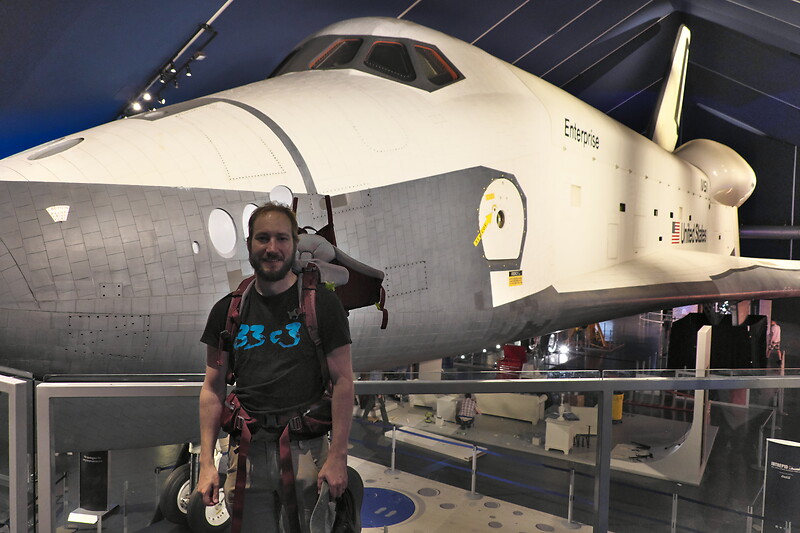

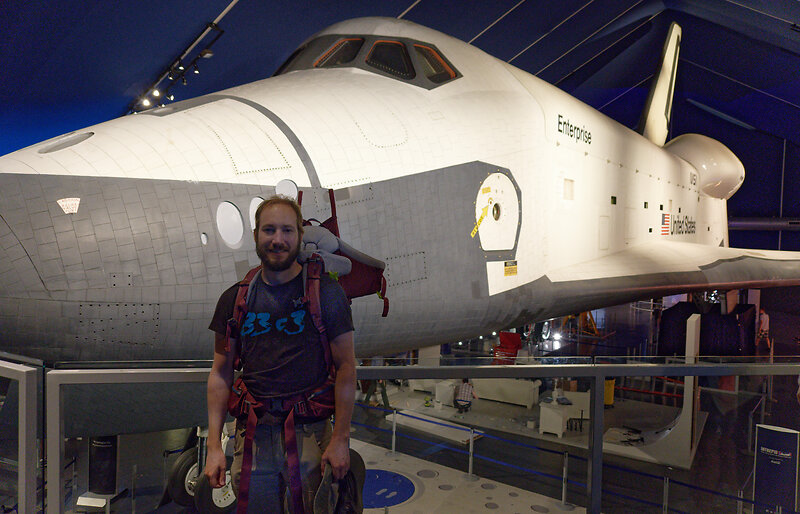
📂 DSCF8214.RAF (22.1 MB) 
A shot of myself, underexposed, in front of Space Shuttle Enterprise. I want to brighten myself and adjust the white balance on my body so it matches the rest of the room. (I have better examples than this, but they showed people other than me, which I don't share.)
Photo Ninja, and RawTherapee fail this test, as they lack local adjustment tools. Exposure for some reason shows terrible color bleeding, where my arm's color is leaking out onto the Space Shuttle in the background. Truly noteworthy is ACDSee with its intelligent brush, much like the intelligent selection tools in pixel editors. Darktable als stands out for being able to combine a drawn mask with a luminosity and hue mask.
Capture One strangely did something terrible to my skin, with weird gradients where there should be none. The Shuttle in the background lost details in the highlights in ACDSee and Exposure and Zoner. DxO has various ways of drawing masks. In this case I used control points, but none of them worked particularly well. I expect that they would need some practice to use well. Silkypix by default insisted on crazy noise reduction that turned the picture into a watercolor. Thankfully that is easy to turn down.
- ACDSee: Fill Light 50, Develop Brush with WB -50 (no picker)
- Capture One: Shadows +50, Black +75, Drawn Layer with White Balance picker on Backpack
- Darktable: My Defaults, Filmic RGB to shift dynamic range to include shadows, Luminosity and Painted mask with Color Balance picker
- Exposure: Shadows +100, Blacks +25, Layer with Color Temperature lowered (no picker)
- Lightroom: Shadows +100, Local Adjustment with WB -14 (no picker)
- Luminar: Shadows +50, Local Adjustments with WB -46, Tint -6, Shadows 100
- ON1: Shadows +50, Local Adjustment with WB -18 and Tint +4 (no picker)
- Photo Ninja: Illumination 25, Exposure offset -1.61, Highlights -0.50 (all chosen automatically), Shadows +0.50, No local adjustments available
- RawTherapee: Shadows 50, No local adjustments
- Silkypix: Dodge HDR 50, Noise Reduction Smoothness 25, Partial Correction with Hue 130, Saturation 0.37
- Zoner: Shadows 50, Black 10, Local Adjustments with Shadows 30, Saturation -10, and Blue/Green pushed in Tone Curve (no picker)
- DxO: Shadows 25, Black 25, Local Adjustments with lowered WB, Shadows 25
I find local color adjustments my main use for localized edits. Having a color picker for that is very useful, but only available in Capture One, Darktable, and Luminar. In the other tools, I had to either eyeball it, or manually adjust tones until the RGB values read grey.
Thus, it is Lightroom, ON1, and Darktable that pass this test.
Out of Gamut Colors


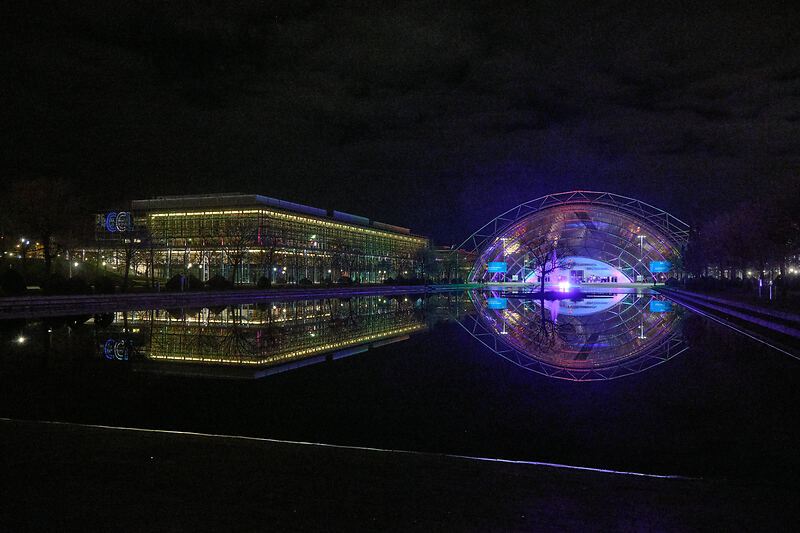
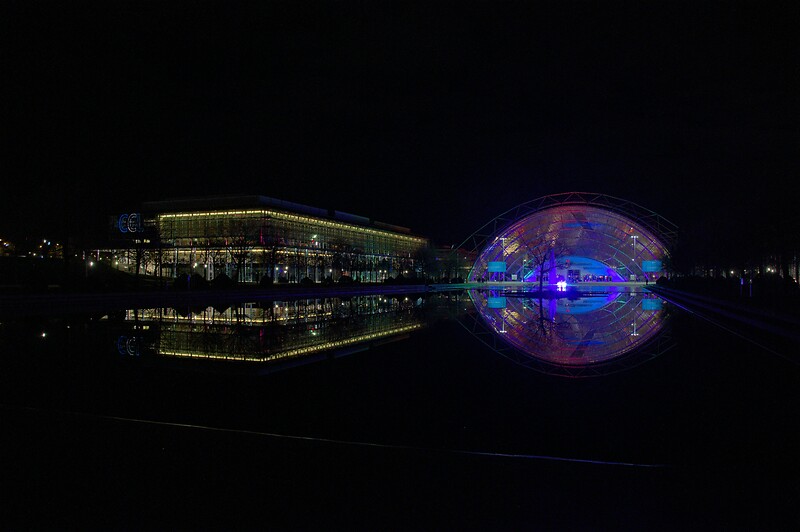


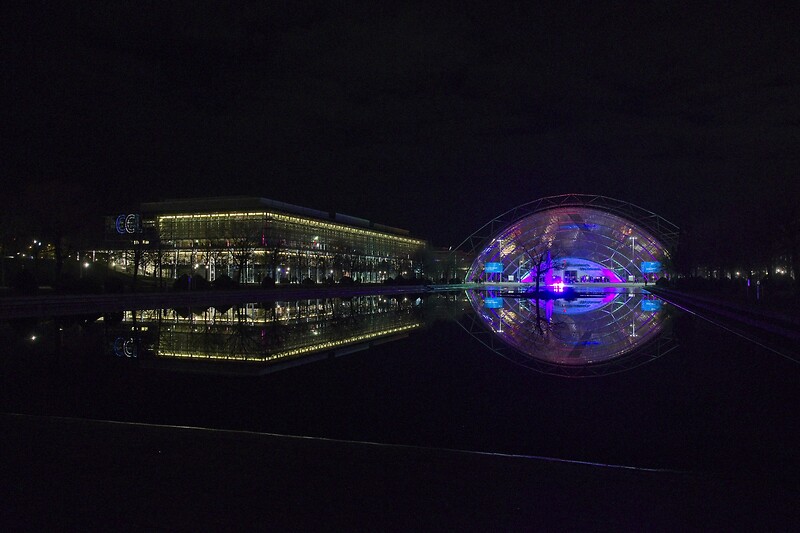
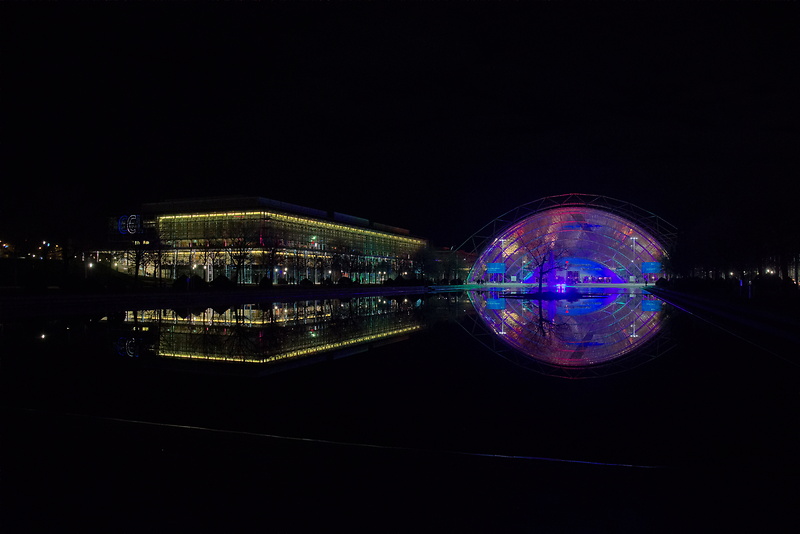
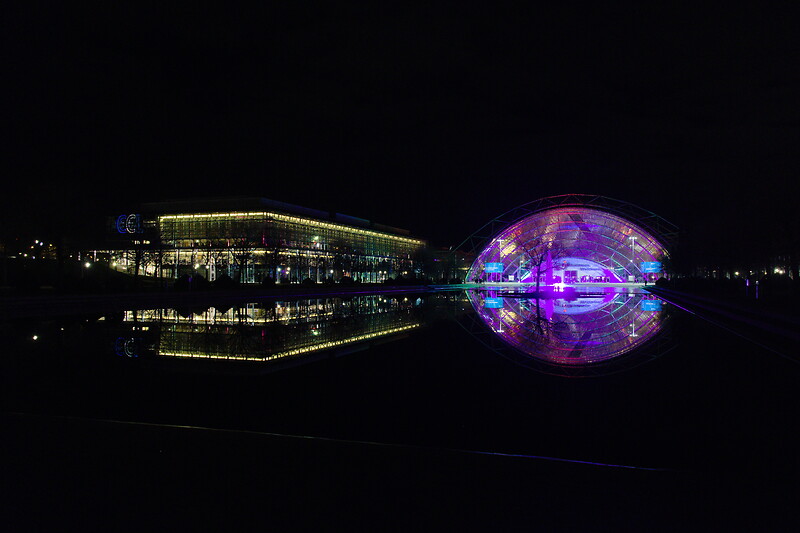


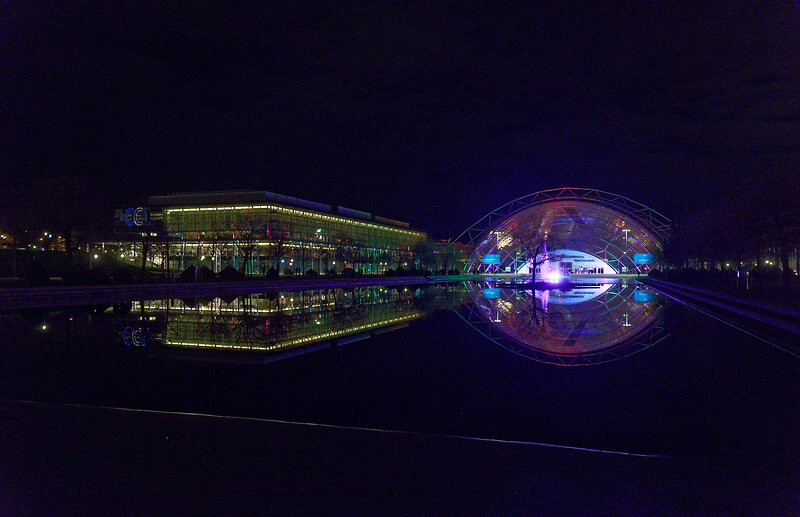
📂 DSCF0034.RAF (15.7 MB) 
A shot of the Congress building in Leipzig, with a bright purple light that blows out the red color channel, which is wildly out of gamut of any reasonable color space. I want to see how the RAW developers deal with out-of-gamut colors. I raise Exposure by 1 EV, then push shadows until the clouds become faintly visible.
ACDSee, ON1, Photo Ninja, and RawTherapee fail this task, with obvious magenta or blue artifacts on the illuminated water jet. The other developers use various methods of inpainting, which look particularly convincing in Capture One, Lightroom, Silkypix, Luminar, DxO, and Zoner. Exposure and Darktable look less realistic, but acceptable in a pinch. Again, Silkypix' hue slider is very handy.
- ACDSee: Fill Light 50, Exposure +1
- Capture One: Black +75, Exposure +1
- Darktable: My Defaults, Filmic RGB
- Exposure: Blacks +50, Exposure +1
- Lightroom: Shadows +100, Exposure +1
- Luminar: Shadows +25, Exposure +1
- ON1: Shadows +50, Exposure +1
- Photo Ninja: Illumination 9, Highlights -0.50 (all chosen automatically), Exposure offset 0.0
- RawTherapee: Shadows 50, Exposure +1 (Highlight Reconstruction: Blend)
- Silkypix: Dodge HDR 100, Noise reduction Smoothness 25, Highlight Hue 100
- Zoner: Exposure 1.0, HDR Shadows 25%
- DxO: Exposure 1.0, Shadows 75, Midtones -100
I know the Darktable devs are actively working on improving this. In truth, Darktable would have failed this task just a few months ago. Issues like these also often happen with deep-blue flowers, which turn purple in the failing developers but maintain hue in the better ones.
Color Rendition and Detail
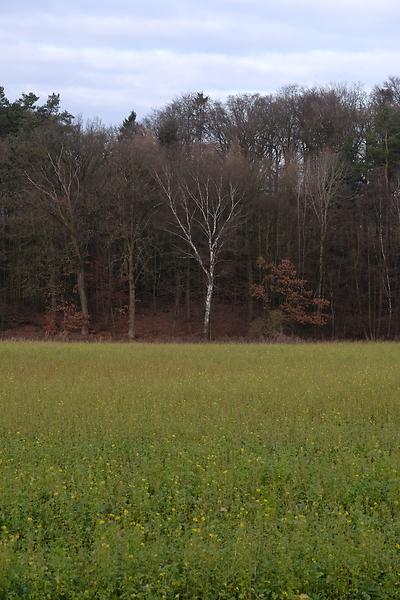

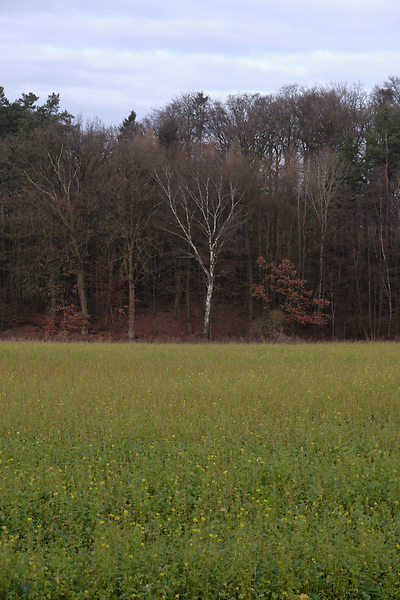


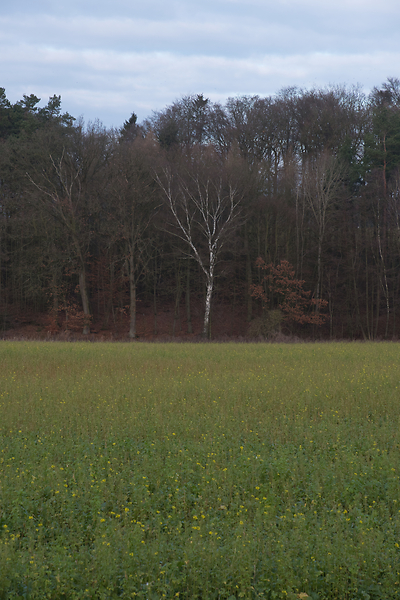
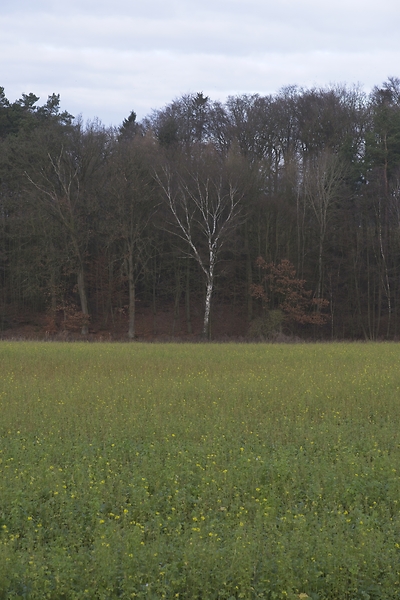


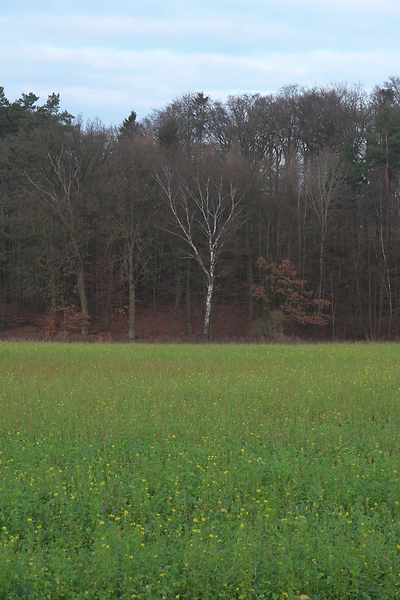
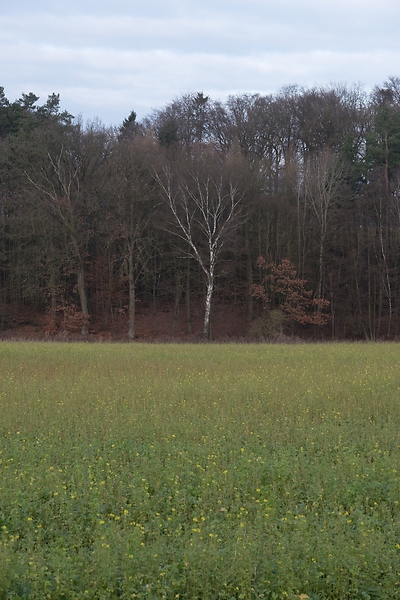

📂 DSCF9670.RAF (25.7 MB) 
A shot of a field and forest. I want to see how the RAW developers render these details and colors. Zero out noise reduction, use default sharpening, JPEG 100%.
In terms of detail, Lightroom, Capture One, Exposure, Silkypix, Zoner, DxO, and Darktable seem to retain the most fine details, particularly in the little trees and the forest floor. ACDSee, Luminar, RawTherapee, Photo Ninja, and ON1 look comparatively soft or lose detail in the shadows. Silkypix, however, has a strange, painterly look to the grass details that I wasn't able to get rid of.
In terms of overall color, Exposure, Photo Ninja, RawTherapee, and Capture One clearly tend towards the most saturated look, with a clear distinction between a green and a yellow part in the field. I suspect that these try to approximate the punchy look of Fuji's colors. These color transitions are much more subtle in ACDSee, Darktable, Exposure, Lightroom, Luminar, Silkypix, Zoner, DxO, and ON1. The sky is distinctly blue in Darktable, Photo Ninja, DxO, and Luminar, more cyan in ACDSee, Lightroom, and Silkypix, and weirdly purple in Capture One and RawTherapee.
- ACDSee: Amount 25
- Capture One: Amount 140
- Darktable: My Defaults, Sharpen 2
- Exposure: Amount 50
- Lightroom: Amount 40
- Luminar: Details Enhancer, Sharpen 50
- ON1: Sharpening 50
- Photo Ninja: Sharpening strength 50
- RawTherapee: Sharpening 20
- Silkypix: Zero Noise reduction, Outline emphasis 30, Ringing artifact control 15 (defaults)
- Zoner: Sharpening strength 150 (Smart Sharpen)
- DxO: Lens Sharpness Global 1.0
I would not put too much emphasis on the colors, saturation, and contrast here, as these are easily and typically adjusted manually. I am a bit surprised about the differences in detail retention, however.
The Result
I went into this expecting to find Lightroom and Capture One to be vastly faster in use than Darktable, particularly on my Surface tablet. I also expected better out-of-the-box image beauty, large differences in user interfaces, and for most tools to have very few graphical artifacts. Surprisingly, however, almost every tool showed obvious artifacts of one kind or another, and few tools were actually faster than Darktable. In terms of tools, I found most tools look very similar, yet function vastly differently.


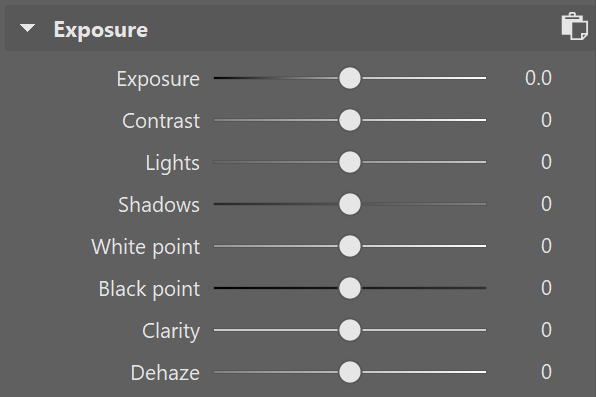
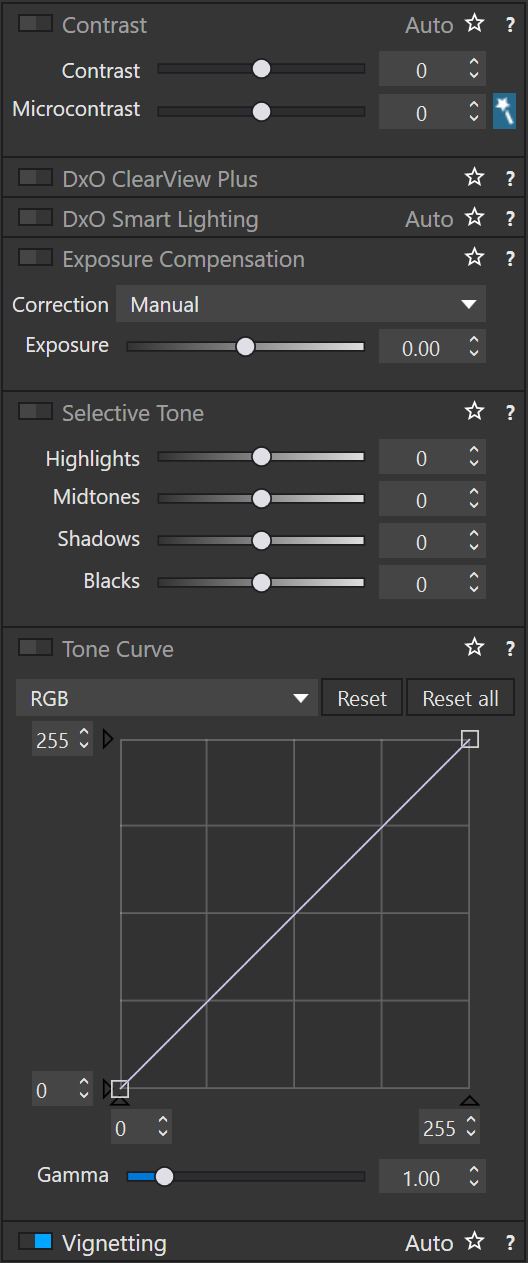
Simple saturation and contrast adjustments, a bit of local contrast, and rarely some dodging and burning or local color adjustments are apparently all I do most of the time, and this generally works well and similarly in all of these tools. However, that is not to say that the individual sliders do remotely the same thing in different tools. So confused was I by this that I measured the response curves of several tools, and they indeed did entirely different things. In one tool, Highlights pushes the upper half of the tone curve. In another, even the darkest shadows are affected a little bit. In yet another, Highlights burns out to the upper quarter of the tone curve if pushed all the way. Sometimes the white point stays white, sometimes it moves. Sometimes it only moves if the slider is pushed past half-way. And that's not even taking into account their different blending behavior and value scales; these sliders may look the same, but there hides complexity beyond measure.
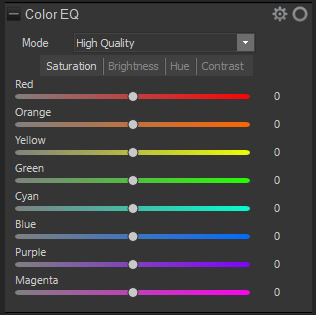
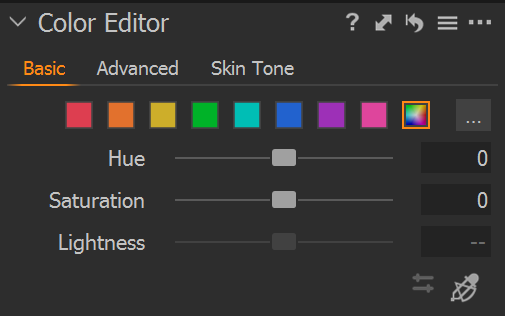

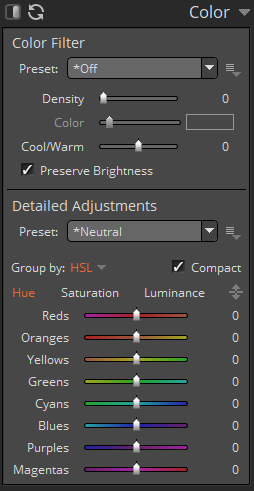
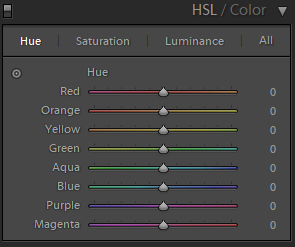
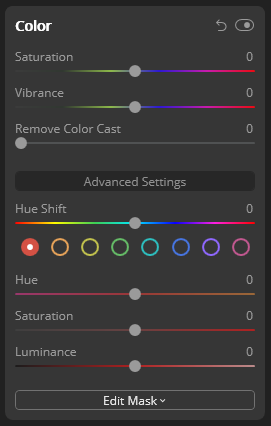


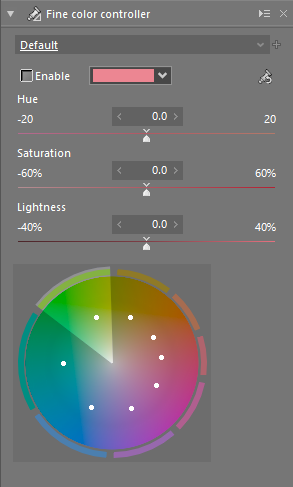

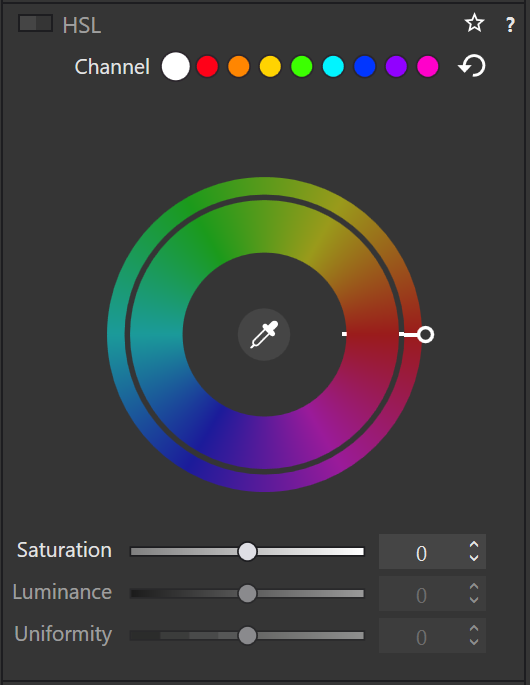
And I did find a surprising amount of graphical artifacts in these programs, particularly the color bleeding in Exposure, and the highlight recovery problems in Luminar and ON1, as well as a number of smaller issues. The one program that truly stands out here is Lightroom, which is more robust to artifacts than any other tool in this list, seemingly due to some significant image-adaptive intelligence under the hood.
I have strong mixed feelings about Capture One. On the one hand, it has one of the most attractive user interfaces of all these tools. On the other, its color renditions are very opinionated, and not my favorite. I love how it reads and applies Fuji color profiles as shot, but then it doesn't apply the Fuji shadow/highlight adjustments and crushes the shadows unnecessarily. And while its color tools sure look nice, their functionality is not that much different than the other developers', and they are spread out needlessly across several tabs. And that price.
Playing around with Luminar was deeply impressive. There are a ton of magic and automatic features in there. But as cool as AI sky replacement is, it simply has no place in my toolbelt, and the general speed of the UI are a big minus.
I like ON1. It's relatively affordable, works with simple JSON sidecar files instead of a library, has reasonable tools, and impressive effects. It can even mimic the look of the embedded JPEG and supports Fuji film simulations. Not quite on the graphical level as Capture One or Lightroom, but very close. And it even runs acceptably fast on my Surface tablet.
Exposure is another program I could like a lot, but the color bleeding and graphical artifacts are just not up to snuff. In one example, it entirely failed to guess colors from an underexposed bar scene (not shown). In another it bled colors out onto adjacent objects for no reason. And white balance sometimes changed lightness as well as colors. I read that this might be a graphics driver issue, but regardless, it shook my confidence in Exposure.
ACDSee was a real surprise to me. I seem to remember it as a fast image viewer, but apparently it is (now?) an impressive RAW editor as well. There is a lot to like about this tool. The magic brush for local adjustments is a particularly noteworthy touch, as well as very robust healing tools. Alas, I found the UI rather slow, and it failed on exporting a few files. I'll try again in a year or so.
I was only made aware of Silkypix through a comment after the post had already been published (thank you!). And what I read on the website made me quite excited! Its tools stray somewhat from the Lightroom-inspired norm, which is a very good thing in some cases, such as the hue-priority highlight recovery. It also works on plain files, and seems to have outstanding Fuji film simulations. Alas, it was very slow to use, and not suitable for my Surface tablet.
I had tried RawTherapee a few times in the past, and was always frustrated by its lack of local adjustments, and the need to view things at 100% to see some adjustments. On the other hand, it can match the embedded JPEG tones, and has quite a number of impressive algorithms. Still, it does not appeal to me. But it's still an amazing achievement and a pretty inspiring community as well.
Photo Ninja is a curious program. Certainly not because of its ease of use, or speed of operation, or image quality. But because it did most things almost correctly automatically. That's not what I am looking for, but it is truly impressive.
I only discovered Zoner Photo about a year after this post was originally published. But I was impressed by what I found: It is a well-designed program with a solid array of tools, even including a pixel editor. And rather affordable, too. Curiously, Zoner Photo does not officially support some of my cameras, but can utilize the free Adobe DNG converter to make them readable on the fly, without creating a separate copy. Smart!
DxO PhotoLabs was another latecomer, which only started supporting Fuji X-Trans files in late 2021. I downloaded it on the day it became available, and was duly impressed. Its tools are less streamlined than in other programs, but seem to be of great algorithmic quality; there was hardly a lightness reversal or halo to be found, the bane of many a cheaper product. I am deeply intrigued.
And Lightroom. As I said, I somehow do not like Lightroom. Maybe because I like to be “different”, or because I associate Adobe too much with bloated software. But I have to say, Lightroom surprised me. While its tools are sometimes in weird locations, it is highly streamlined for a very fast workflow, and it deserves my highest praise for being outstandingly robust against artifacts. But I still don't like it.
Which leaves Darktable. This is a tool I am deeply familiar with, and have used for several years. Yet until this day, I never realized just how strange its tools are compared to the other programs. How weird Filmic RGB must feel if you are used to shadows and highlights sliders, and how alien the graph-based color zones and tone equalizer and contrast equalizer must seem.


Yet, in direct comparison, I find Darktable's tools equally efficient at solving problems, even if the solutions are sometimes a bit different from its Lightroom-inspired peers. One tool in particular I want to emphasize: Color Zones. At first glance, it looks like your standard HSL tool that allows brightness, saturation, and hue changes by color (albeit as a graph instead of sliders). But then you discover the “select-by” switch, and realize that you can modify colors by lightness and saturation, as well as hue. I use this frequently to saturate shadows, which is a great effect I haven't seen in any other program.
No doubt other programs have cool features, too, but Darktable (and RawTherapee) seem uniquely open about their inner workings. And this brings joy to me, on a level the closed, artistic programs can't match. I like graphs, and maths. I'm weird like that.
But what really prompted this whole comparison blog post was my frustration with Darktable's speed. Particularly on my 4K screen, it is not the fastest program out there. And the AMD/OpenCL situation on Linux is still a travesty, which doesn't help. But I learned a thing during this experiment: You must work bottom-up through the rendering chain, if you want Darktable to be fast4. Which, in my case, usually means working through Lens Correction → Crop and Rotate → Exposure → Tone Equalizer → Contrast Equalizer → Color Balance → Filmic RGB → Color Zones. As long as I (mostly) edit things in this order, Darktable is fast enough, even on my Surface tablet.
Lastly, I have to say a few words about file management. Most programs here work on some kind of local library that stores all edits. The downside of this is that these libraries are hard to sync between computers, are hard to back up, and need to manually be kept in sync when file locations change. Notable exceptions here are Lightroom, Darktable, Exposure5, Silkypix5, RawTherapee, ON1, DxO, and Zoner, which keep their edits alongside the RAW files in little text “sidecar” files6. Thus even if their library goes out of sync or is lost, at least the edits are still there. To be honest, this is quite an important factor for me.
As for library management, my requirements are small: I want to filter by date, rating, and maybe camera or lens. These needs are met by all programs except possibly Luminar and Photo Ninja. I do most of my file management in external programs on camera import, and with the exported JPEGs, so this area of the RAW developers is not very important to me.
However, this comparison also highlighted just how useful sidecar files are to photo management. I might choose different RAW developers over the years, and my photo management solutions might change over time as well. But as long as all edits are stored in simple text files next to the RAW file, I can rest safe in the knowledge that my edits will never be lost. This is a serious downside to ACDSee, Capture One, Luminar, and Photo Ninja, who keep edits secretly7 in their opaque databases.
I also timed my work with every one of these programs. Quite surprisingly, I couldn't find any significant differences between programs. Darktable's workflows, for example, are sometimes entirely different from other tools; but if you know what you're doing the path from identifying a problem to fixing it is still similarly straight-forward and fast. And there is no less experimentation until I arrive at a look I like.
Thus, I am left with Darktable, Lightroom, and ON1. And theoretically Capture One, but that price is just too high for me. If Capture One were \(100 instead of \)350, I would probably switch to it. Even educational pricing is only available for rentals. I'll have to decline that. And despite all my praise for Lightroom, I still don't like it.
I'll probably buy ON1 at its current, discounted price ($50), and see how I like it in actual daily use8. But at the same time. I'll also stick with Darktable on my Linux machine, at least for more complicated edits. I now know that Darktable can dance with the best of them, which is mighty impressive for a piece of free software.
With all that said and done, I have learned a lot about RAW development during this experiment. Regardless of which tool I end up sticking with, this has been a fascinating comparison. We'll see how long I can resist the urge to compare this time.
Addendum: Customer Support
So far, I have been in contact with the Customer Support people of ON1, Capture One, and Zoner. And I must say, ON1 and Zoner were incredibly pleasant and quick and helpful, while Capture One seemed almost reluctant to help. This is actually a big plus for ON1 and Zoner, and kind of big turnoff for Capture One.
Update: Silkypix
I added Silkypix to the comparison, thanks to kind comments underneath this post.
Update: Luminar Local Adjustments
I was made aware that Luminar does indeed have local adjustments, they were merely in such an uncommon place that I hadn't found the initially.
Update: Zoner Photo
One year after the original post, I added Zoner Photo to the comparison.
Update: DxO PhotoLab
One-and-a-half years after the original post, DxO Photo Labs added support for Fuji files, so I added them to the comparison.
There are surprisingly few non-superficial comparisons; most are just feature matrix comparisons. The best ones I could find are a fantastic, in-depth comparison on nomadlens, A Fuji-centric discussion of detail extraction on Fuji vs. Fuji, one by Andy Bell that might be sponsored/biased by Luminar, a pretty good one on PetaPixel, an older one on DPReview, and a Nikon-centered one on WY Pictures.↩
Makes it much easier to share edits between computers, and back them up↩
I don't like rental software, as it locks away all past edits once I stop paying.↩
because lower stages in the pipeline are cached, but higher stages need to be recalculated after every edit.↩
in an unnecessary subdirectory↩
Capture One saves sidecar files, too, but only for metadata, not edits↩
They would say, "securely"↩
not really daily, but you know what I mean↩
