Darktable for Fujifilm Cameras
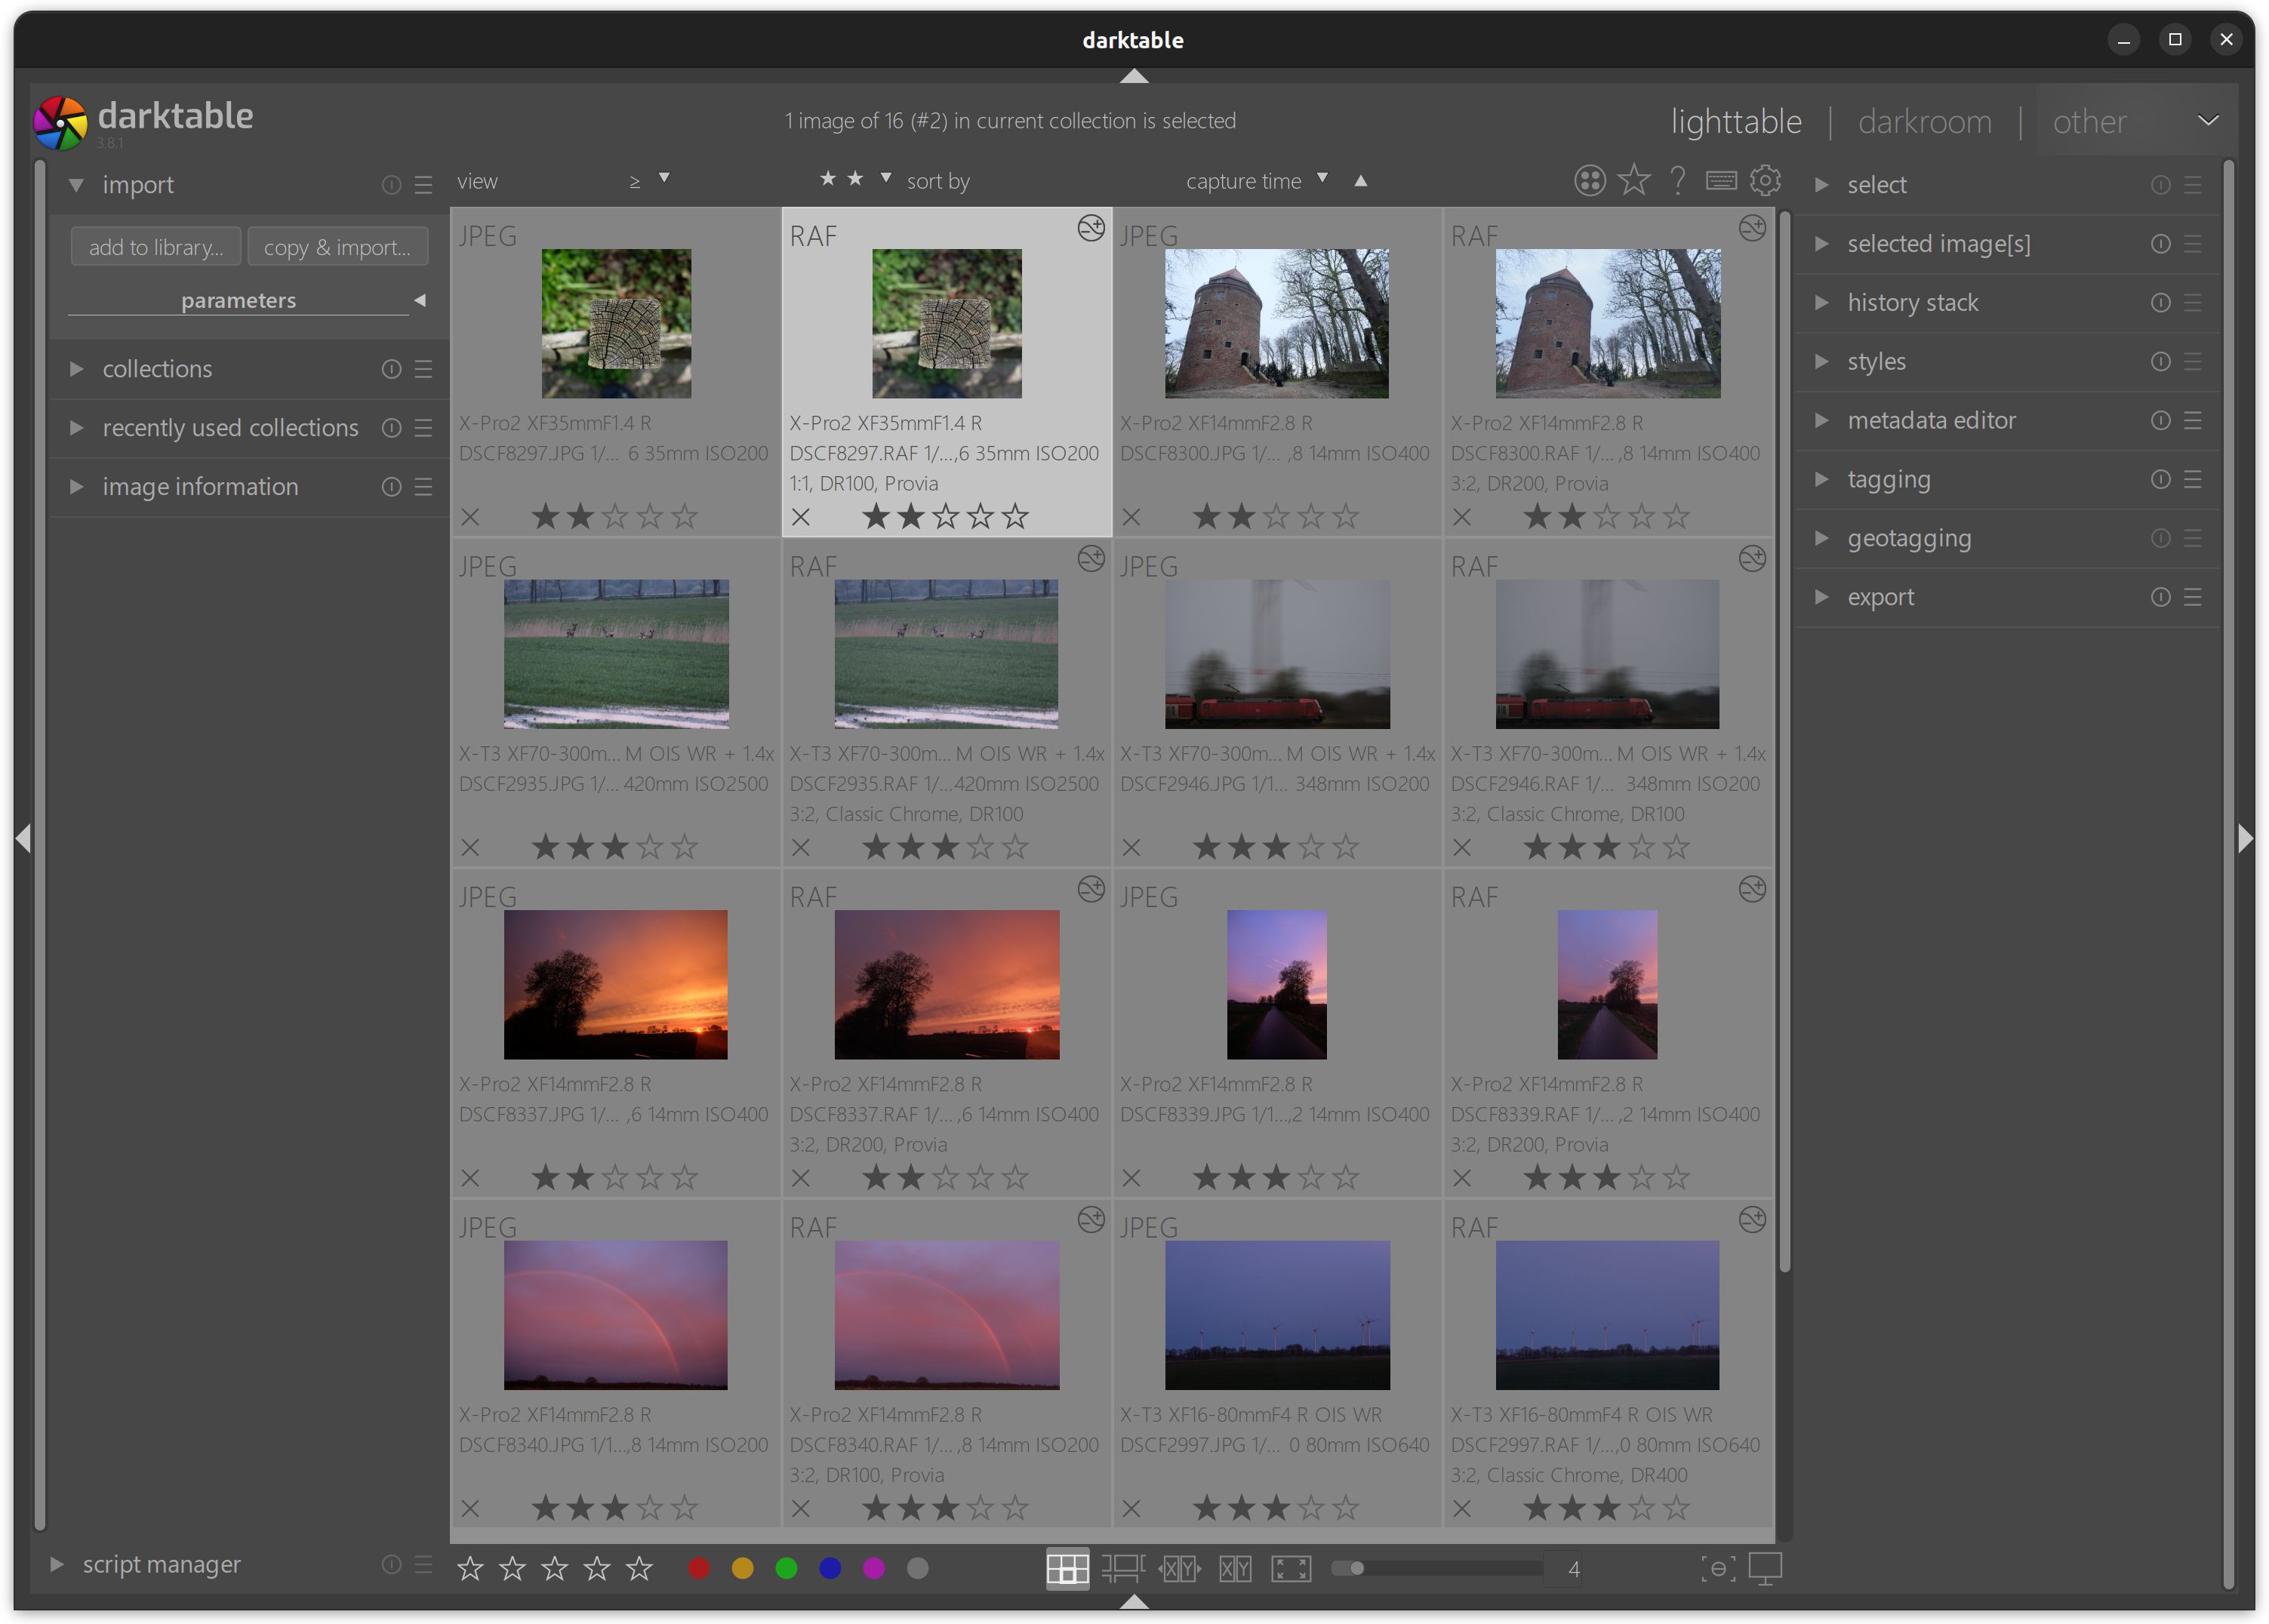
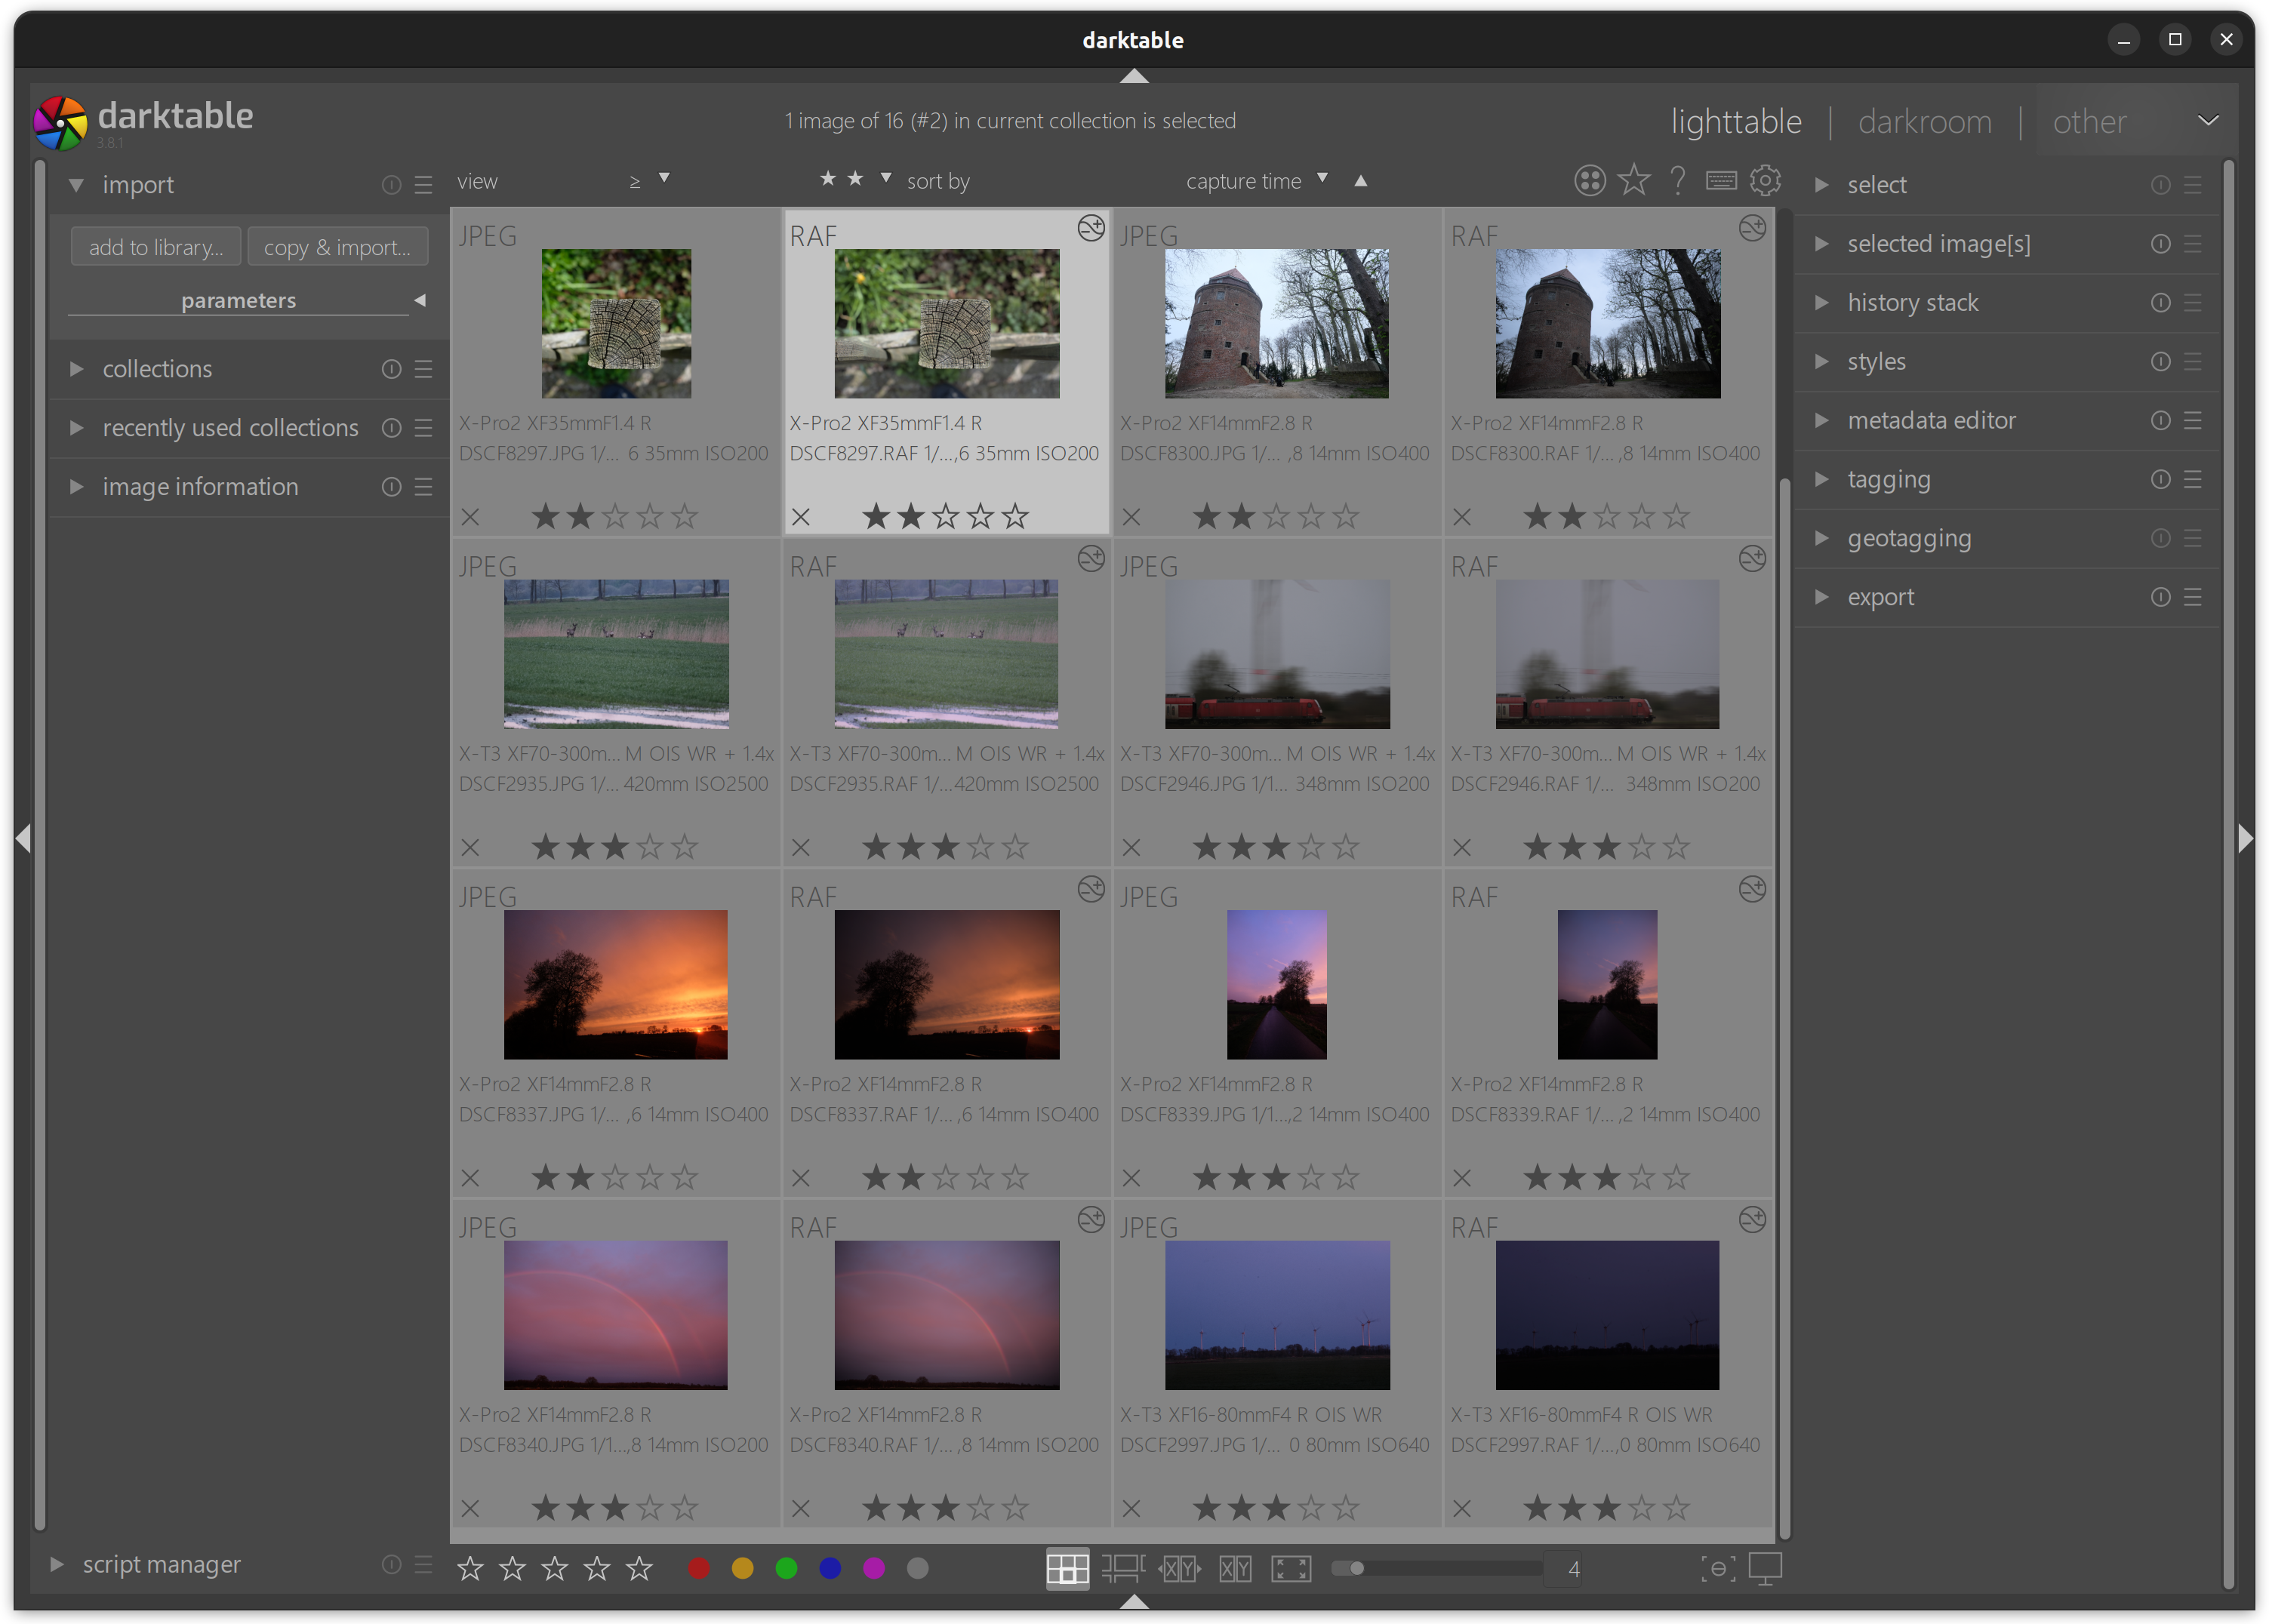
You know what I like to see when I import photos from my Fujifilm camera into Darktable?

However, that is not the default. Darktable, like most raw developers, is camera-agnostic.
agnostic
ăg-nŏs′tĭknoun [...]
- One who is doubtful or noncommittal about something.
Which means that Darktable does not know about any Fujifilm-specific raw file metadata, such as crop, dynamic range modes, or film simulations. Thus what you'd normally see in Darktable is more like this:

Notice how all the DR200/DR400 images are underexposed by one and two stops, how the first JPG is a square crop, but the RAF is 3:2, how the color of the grass and the train are subtly different in RAF and JPG.
But thankfully, Darktable has a scripting interface for automating things. And what I've done here is a little script that uses exiftool to read the missing metadata from the RAF file and apply appropriate styles to get Darktable's default rendering close to the JPG.
Here's the lua script in its entirety:
--[[ fujifilm_auto_settings-0.2

Apply Fujifilm film simulations, in-camera crop mode, and dynamic range.

Copyright (C) 2022 Bastian Bechtold <bastibe.dev@mailbox.org>

This program is free software; you can redistribute it and/or modify
it under the terms of the GNU General Public License as published by
the Free Software Foundation; either version 2 of the License, or
(at your option) any later version.

This program is distributed in the hope that it will be useful,
but WITHOUT ANY WARRANTY; without even the implied warranty of
MERCHANTABILITY or FITNESS FOR A PARTICULAR PURPOSE.  See the
GNU General Public License for more details.

You should have received a copy of the GNU General Public License along
with this program; if not, write to the Free Software Foundation, Inc.,
51 Franklin Street, Fifth Floor, Boston, MA 02110-1301 USA.
--]]

--[[About this Plugin
Automatically applies styles that load Fujifilm film simulation LUTs,
copy crop ratios from the JPG, and correct exposure according to the
chosen dynamic range setting in camera.

Dependencies:
- exiftool (https://www.sno.phy.queensu.ca/~phil/exiftool/)
- Fuji LUTs (https://blog.sowerby.me/fuji-film-simulation-profiles/)

Based on fujifim_dynamic_range by Dan Torop.

  Film Simulations
  ----------------

Fujifilm cameras are famous for their film simulations, such as Provia
or Velvia or Classic Chrome. Indeed it is my experience that they rely
on these film simulations for accurate colors.

Darktable however does not know about or implement these film
simulations. But they are available to download from Stuart Sowerby as
3DL LUTs. (PNG LUTs are also available, but they show a strange
posterization artifact when loaded in Darktable, which the 3DLs do
not).

In order to use this plugin, you must prepare a number of styles:
- provia
- astia
- velvia
- classic_chrome
- pro_neg_standard
- pro_neg_high
- eterna
- acros_green
- acros_red
- acros_yellow
- acros
- mono_green
- mono_red
- mono_yellow
- mono
- sepia

These styles should apply the according film simulation in a method of
your choosing.

This plugin checks the image's "Film Mode" exif parameter, and applies
the appropriate style. If no matching style exists, no action is taken
and no harm is done.

  Crop Factor
  -----------

Fujifilm cameras allow in-camera cropping to one of three aspect
ratios: 2:3 (default), 16:9, and 1:1.

This plugin checks the image's "Raw Image Aspect Ratio" exif
parameter, and applies the appropriate style.

To use, prepare another four styles:
- square_crop_portrait
- square_crop_landscape
- sixteen_by_nine_crop_portrait
- sixteen_by_nine_crop_landscape

These styles should apply a square crop and a 16:9 crop to
portrait/landscape images. If no matching style exists, no action is
taken and no harm is done.

  Dynamic Range
  -------------

Fujifilm cameras have a built-in dynamic range compensation, which
(optionally automatically) reduce exposure by one or two stops, and
compensate by raising the tone curve by one or two stops. These modes
are called DR200 and DR400, respectively.

The plugin reads the raw file's "Auto Dynamic Range" or "Development
Dynamic Range" parameter, and applies one of two styles:
- DR200
- DR400

These styles should raise exposure by one and two stops, respectively,
and expand highlight latitude to make room for additional highlights.
I like to implement them with the tone equalizer in eigf mode, raising
exposure by one/two stops over the lower half of the sliders, then
ramping to zero at 0 EV. If no matching styles exist, no action is
taken and no harm is done.

These tags have been checked on a Fujifilm X-T3 and X-Pro2. Other
cameras may behave in other ways.

--]]

local dt = require "darktable"
local du = require "lib/dtutils"
local df = require "lib/dtutils.file"

du.check_min_api_version("7.0.0", "fujifilm_auto_settings")

-- return data structure for script_manager

local script_data = {}

script_data.destroy = nil -- function to destory the script
script_data.destroy_method = nil -- set to hide for libs since we can't destroy them completely yet, otherwise leave as nil
script_data.restart = nil -- how to restart the (lib) script after it's been hidden - i.e. make it visible again

local function exiftool_get(exiftool_command, RAF_filename, flag)
    local command = exiftool_command .. " " .. flag .. " -t " .. RAF_filename
    dt.print_log(command)
    local output = io.popen(command)
    local exiftool_result = output:read("*all")
    output:close()
    if #exiftool_result == 0 then
        dt.print_error("[fujifilm_auto_settings] no output returned by exiftool")
        return
    end
    local exiftool_result = string.match(exiftool_result, "\t(.*)")
    if not exiftool_result then
        dt.print_error("[fujifilm_auto_settings] could not parse exiftool output")
        return
    end
    exiftool_result = exiftool_result:match("^%s*(.-)%s*$") -- strip whitespace
    return exiftool_result
end

local function apply_style(image, style_name)
    for _, s in ipairs(dt.styles) do
        if s.name == style_name then
            dt.styles.apply(s, image)
            return
        end
    end
    dt.print_error("[fujifilm_auto_settings] could not find style " .. style_name)
end

local function apply_tag(image, tag_name)
    local tagnum = dt.tags.find(tag_name)
    if tagnum == nil then
        -- create tag if it doesn't exist
        tagnum = dt.tags.create(tag_name)
        dt.print_log("[fujifilm_auto_settings] creating tag " .. tag_name)
    end
    dt.tags.attach(tagnum, image)
end


local function detect_auto_settings(event, image)
    if image.exif_maker ~= "FUJIFILM" then
        dt.print_log("[fujifilm_auto_settings] ignoring non-Fujifilm image")
        return
    end
    -- it would be nice to check image.is_raw but this appears to not yet be set
    if not string.match(image.filename, "%.RAF$") then
        dt.print_log("[fujifilm_auto_settings] ignoring non-raw image")
        return
    end
    local exiftool_command = df.check_if_bin_exists("exiftool")
    if not exiftool_command then
        dt.print_error("[fujifilm_auto_settings] exiftool not found")
        return
    end
    local RAF_filename = df.sanitize_filename(tostring(image))

    -- dynamic range mode
    -- if in DR Auto, the value is saved to Auto Dynamic Range, with a % suffix:
    local auto_dynamic_range = exiftool_get(exiftool_command, RAF_filename, "-AutoDynamicRange")
    -- if manually chosen DR, the value is saved to Development Dynamic Range:
    if auto_dynamic_range == nil then
        auto_dynamic_range = exiftool_get(exiftool_command, RAF_filename, "-DevelopmentDynamicRange") .. '%'
    end
    if auto_dynamic_range == "100%" then
        apply_tag(image, "DR100")
        -- default; no need to change style
    elseif auto_dynamic_range == "200%" then
        apply_style(image, "DR200")
        apply_tag(image, "DR200")
        dt.print_log("[fujifilm_auto_settings] DR200")
    elseif auto_dynamic_range == "400%" then
        apply_style(image, "DR400")
        apply_tag(image, "DR400")
        dt.print_log("[fujifilm_auto_settings] DR400")
    end

    -- cropmode
    local raw_aspect_ratio = exiftool_get(exiftool_command, RAF_filename, "-RawImageAspectRatio")
    if raw_aspect_ratio == "3:2" then
        apply_tag(image, "3:2")
        -- default; no need to apply style
    elseif raw_aspect_ratio == "1:1" then
        if image.width > image.height then
            apply_style(image, "square_crop_landscape")
        else
            apply_style(image, "square_crop_portrait")
        end
        apply_tag(image, "1:1")
        dt.print_log("[fujifilm_auto_settings] square crop")
    elseif raw_aspect_ratio == "16:9" then
        if image.width > image.height then
            apply_style(image, "sixteen_by_nine_crop_landscape")
        else
            apply_style(image, "sixteen_by_nine_crop_portrait")
        end
        apply_tag(image, "16:9")
        dt.print_log("[fujifilm_auto_settings] 16:9 crop")
    end

    -- filmmode
    local raw_filmmode = exiftool_get(exiftool_command, RAF_filename, "-FilmMode")
    local style_map = {
        ["Provia"] = "provia",
        ["Astia"] = "astia",
        ["Classic Chrome"] = "classic_chrome",
        ["Eterna"] = "eterna",
        ["Acros+G"] = "acros_green",
        ["Acros+R"] = "acros_red",
        ["Acros+Ye"] = "acros_yellow",
        ["Acros"] = "acros",
        ["Mono+G"] = "mono_green",
        ["Mono+R"] = "mono_red",
        ["Mono+Ye"] = "mono_yellow",
        ["Mono"] = "mono",
        ["Pro Neg Hi"] = "pro_neg_high",
        ["Pro Neg Std"] = "pro_neg_standard",
        ["Sepia"] = "sepia",
        ["Velvia"] = "velvia",
    }
    for key, value in pairs(style_map) do
        if string.find(raw_filmmode, key) then
            apply_style(image, value)
            apply_tag(image, key)
            dt.print_log("[fujifilm_auto_settings] film simulation " .. key)
        end
    end
end

local function detect_auto_settings_multi(event, shortcut)
    local images = dt.gui.selection()
    if #images == 0 then
        dt.print(_("Please select an image"))
    else
        for _, image in ipairs(images) do
            detect_auto_settings(event, image)
        end
    end
end

local function destroy()
    dt.destroy_event("fujifilm_auto_settings", "post-import-image")
    dt.destroy_event("fujifilm_auto_settings", "shortcut")
end

if not df.check_if_bin_exists("exiftool") then
    dt.print_log("Please install exiftool to use fujifilm_auto_settings")
    error "[fujifilm_auto_settings] exiftool not found"
end

dt.register_event("fujifilm_auto_settings", "post-import-image", detect_auto_settings)

dt.register_event("fujifilm_auto_settings", "shortcut", detect_auto_settings_multi, "fujifilm_auto_settings")

dt.print_log("[fujifilm_auto_settings] loaded")

script_data.destroy = destroy

return script_data
However, there's a catch: Scripts in Darktable can not modify darkroom state directly. But they can load styles. So to make the script work, we need to define a number of styles that do the heavy lifting here:
- Two styles
DR200andDR400for the dynamic range modes that brighten the image by one and two stops, respectively (I like to use the Tone Equalizer like this). - Four styles
square ̲crop_landscapeandsquare ̲crop_portraitandsixteen ̲by ̲nine ̲crop_landscapeandsixteen ̲by ̲nine ̲crop_portraitthat crop landscape/portrait images to 1:1 and 16:9 ratio. - One style for each film simulation you use:
provia,astia,velvia,classic ̲chrome,pro ̲neg ̲standard,pro ̲neg ̲high,eterna,acros,acros ̲green,acros ̲red,acros ̲yellow,mono,mono ̲green,mono ̲red,mono ̲yellow,sepia. The linked styles use Stuart Sowerby's Film Simulation LUTs as film simulations, which must be installed in$LUTs/Fujifilm XTrans III/$lut.3dl.
Download a zip file with all the above styles here, and appropriately-renamed LUTs here. (This section will be revised once I finish building my own set of LUTs).
Then copy the lua script to ~/.config/darktable/lua/contrib/, activate it in the script manager (bottom left in the lighttable), and it should automatically run whenever you import new Fujifilm raf files! (Start Darktable with darktable -d opencl to see debug messages, and bind a keyboard shortcut to lua scripts/fujifilm_auto_settings to trigger the script manually.)
